Generative AI has been a game-changer in the creative process. We’ve all seen those beautiful AI-generated images on social media that catch our attention. Perhaps you’ve considered using AI to generate your own eye-catching visuals for work, business, or personal projects. But the blank prompt field stopped you in your tracks.
This guide is designed to help you overcome the initial creative hurdle and master the art of image prompting. It includes numerous image examples alongside their prompts.
The visual foundation of AI image generation, CGI (computer-generated imagery), and 3D rendering is rooted in real-world photography and cinematography. While the kind of image you want can vary, this guide gives you the vocabulary and tools to describe your vision clearly to the AI.
AI Image Generators
Stable Diffusion, Midjourney, and OpenAI’s Dall-e are the 3 leading AI image generation technologies. Each technology has its own strengths and weaknesses. Without getting into their differences, this guide can help you prompt better images regardless of the platform you choose.
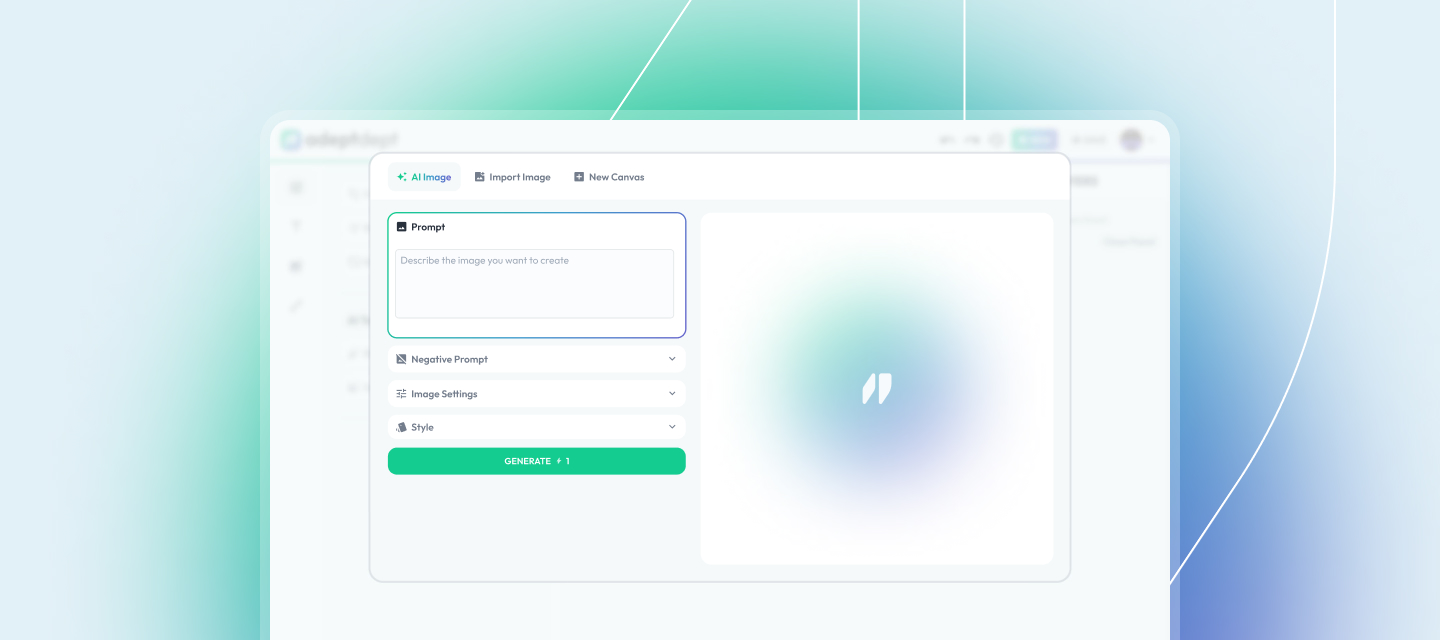
The image examples in this article are produced with Adept Dept’s AI Image Generator, which is based on a Stable Diffusion SDXL model. However, the AI prompting techniques covered here should apply across different AI image generation models.
Art Style
Specifying the art style is crucial for guiding the AI towards your desired artistic vision in image generation. AI models can translate your prompt into a variety of styles, from the realistic detail of photography to the soft washes of watercolor paintings.
Since AI image models often process information sequentially, the words at the beginning of the prompt hold significant weight. Front-loading the art style in the text prompt helps establish a core concept that influences the interpretation of subsequent words. This ensures the AI prioritizes the desired artistic approach throughout the image generation process.
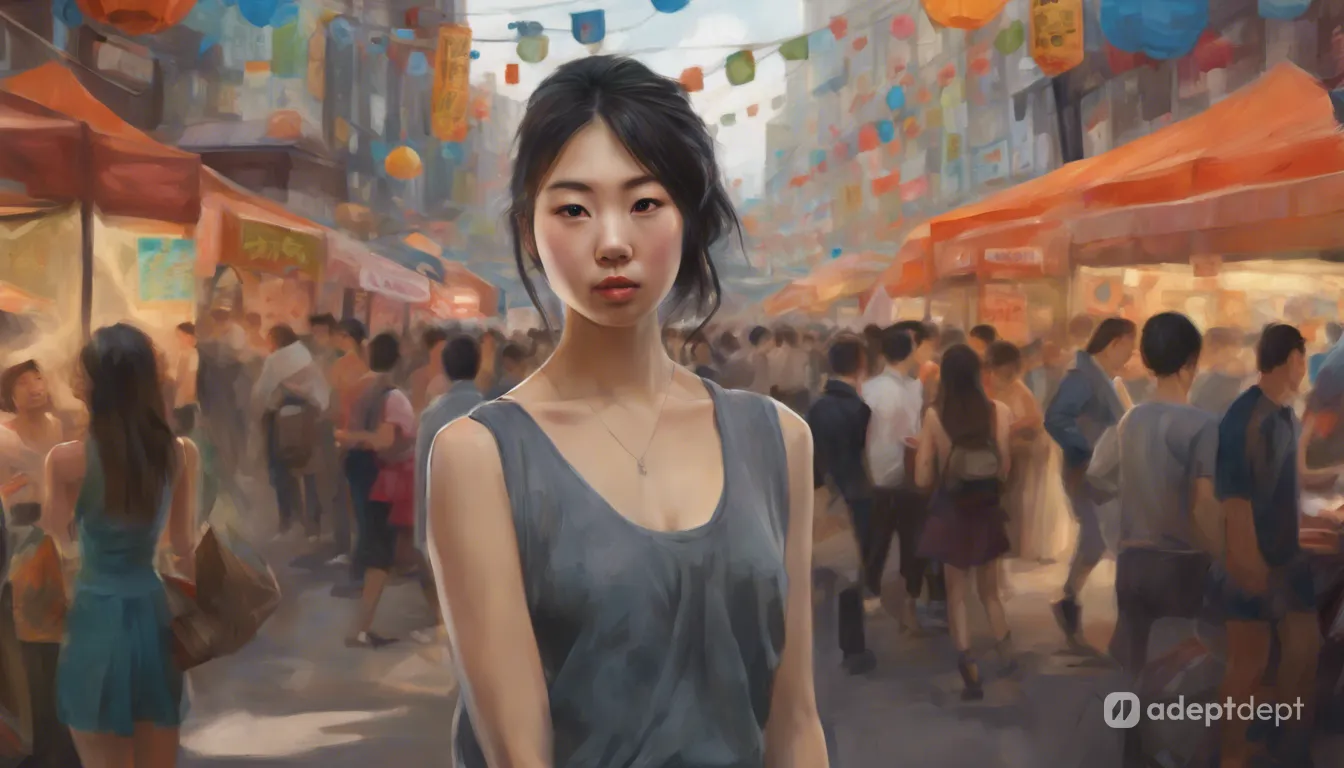
The following image examples all use the same core prompt: “Portrait of Sujin Kim, a young woman, with a bustling street fair in the background.” The only variation lies in the art style, which can be simply added to the beginning of the prompt. Some platforms might even offer a dropdown menu for selecting pre-defined styles.
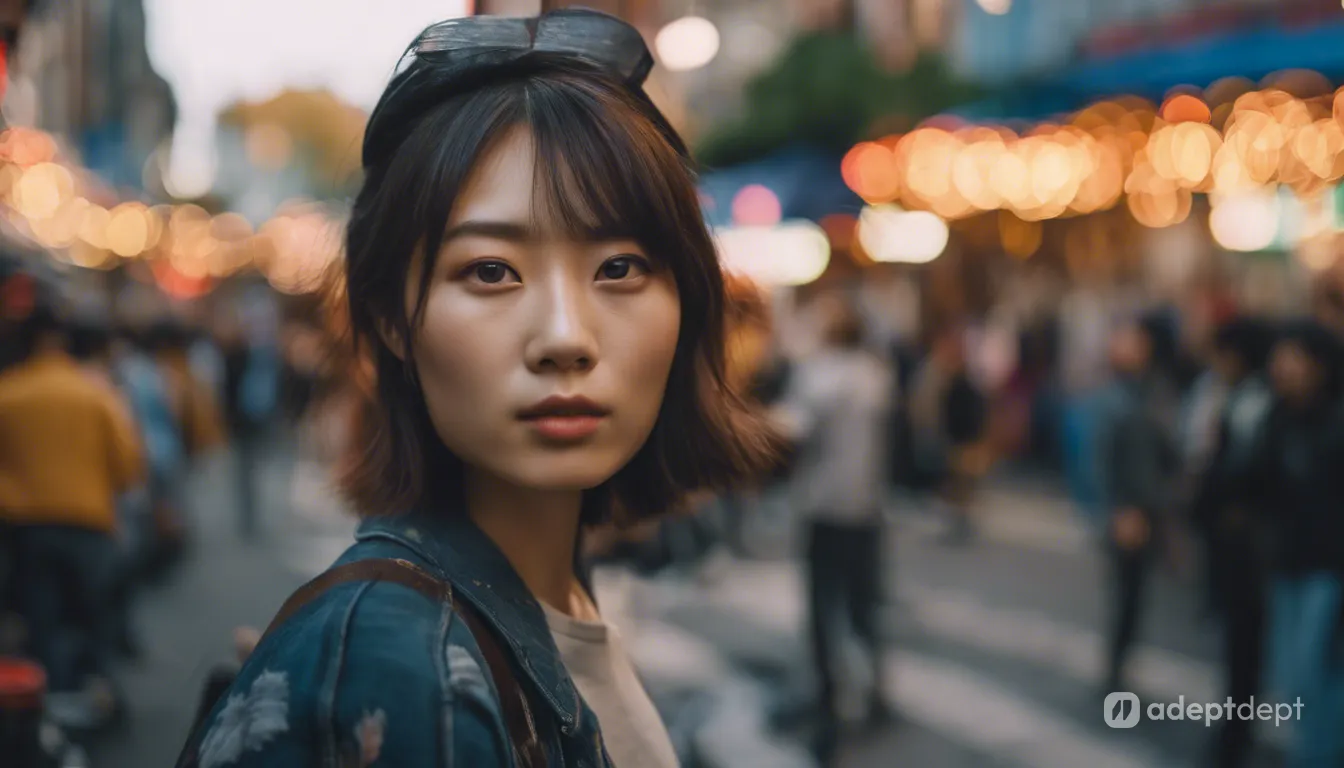
Style: Photographic. Prompt: Portrait of Sujin Kim, a young woman, backdrop of a bustling street fair.
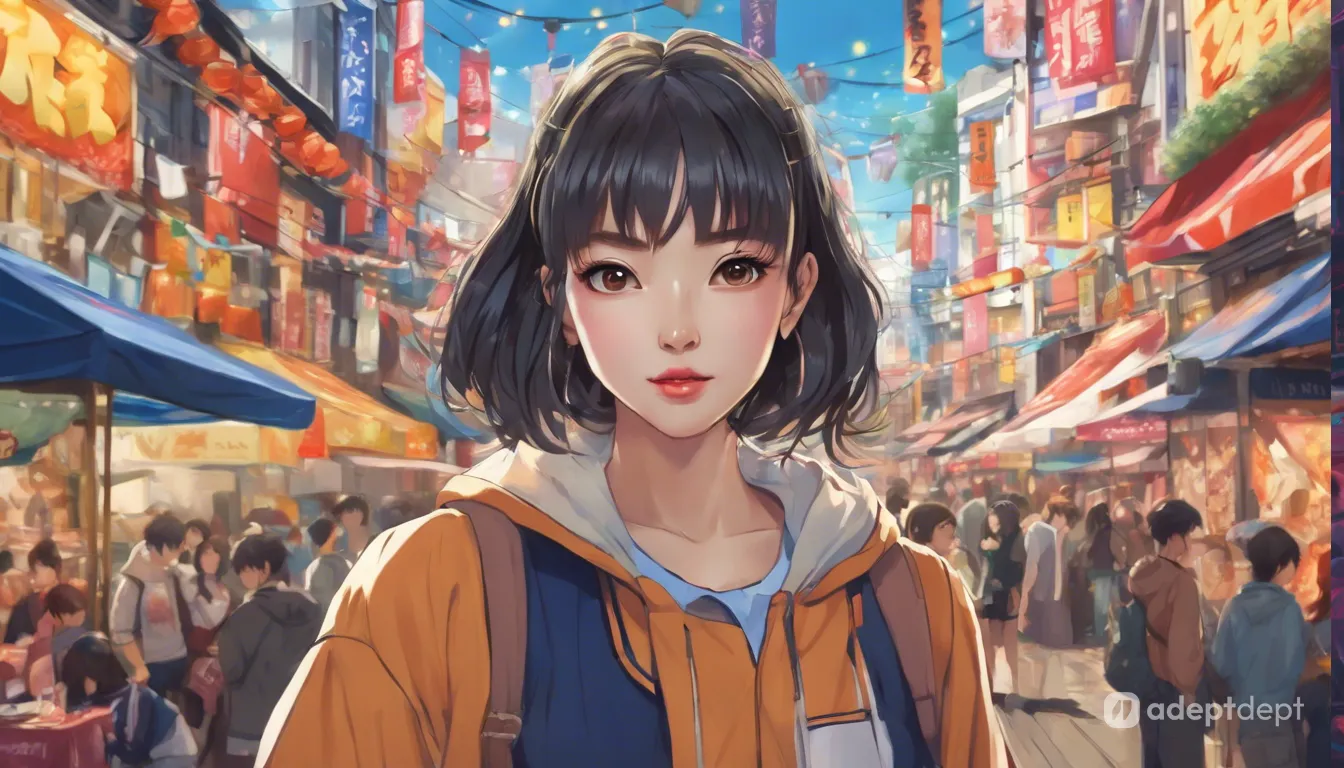
Style: Anime. Prompt: Portrait of Sujin Kim, a young woman, backdrop of a bustling street fair.
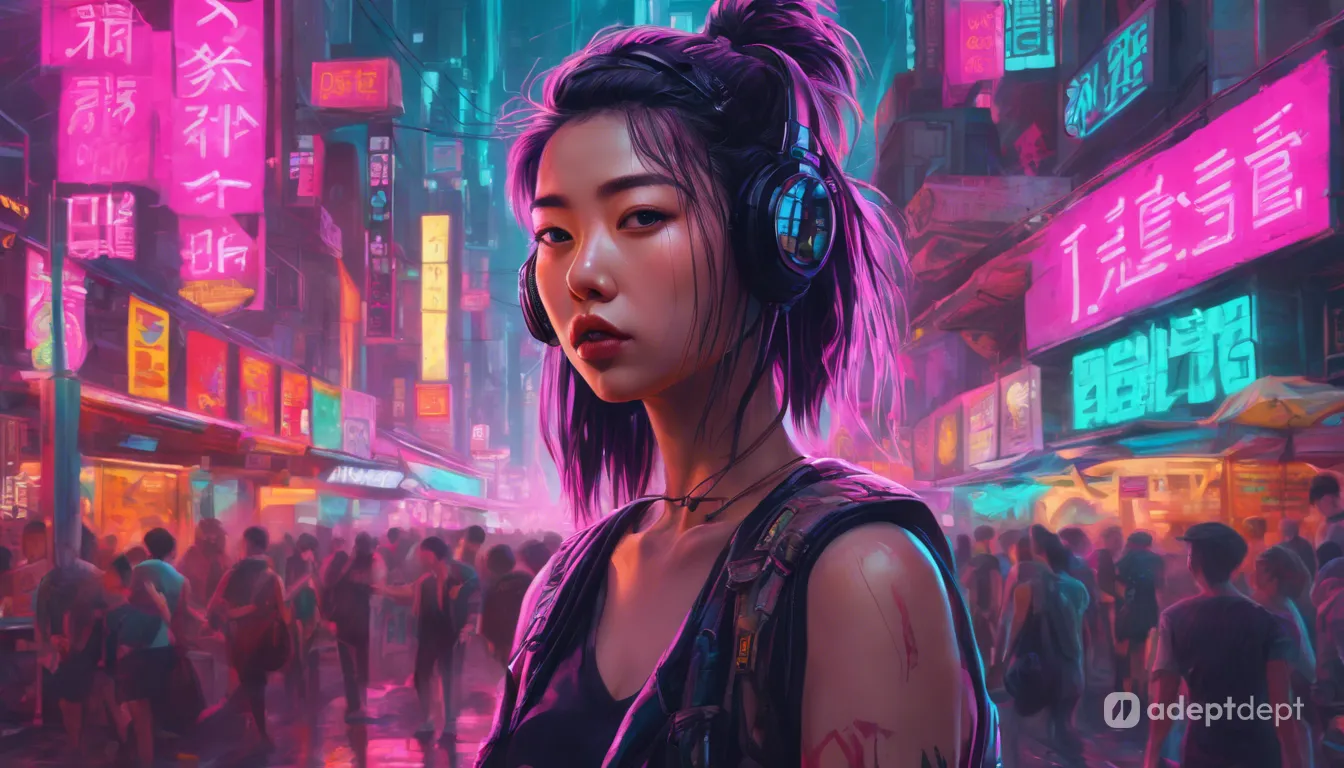
Style: Neon Punk. Prompt: Portrait of Sujin Kim, a young woman, backdrop of a bustling street fair.
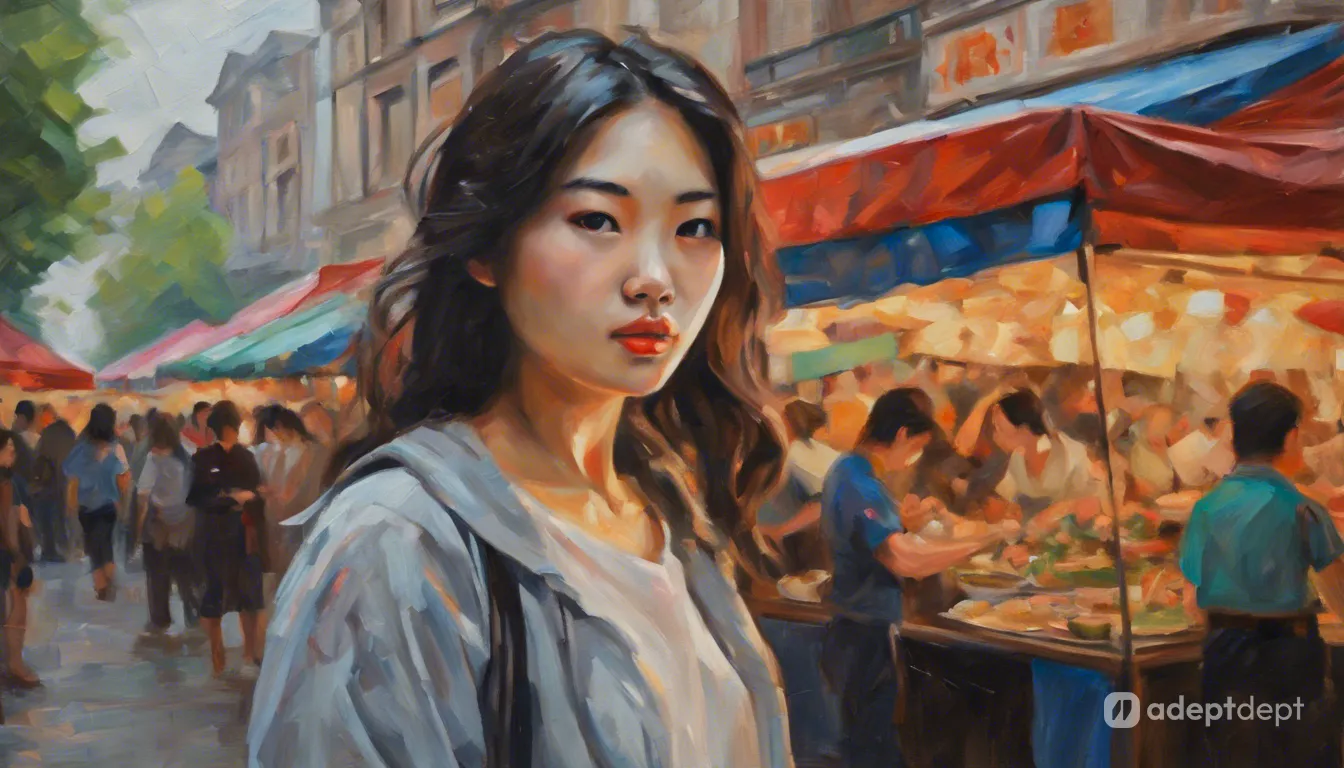
Style: Auto. Prompt: Oil paint portrait of Sujin Kim, a young woman, backdrop of a bustling street fair.
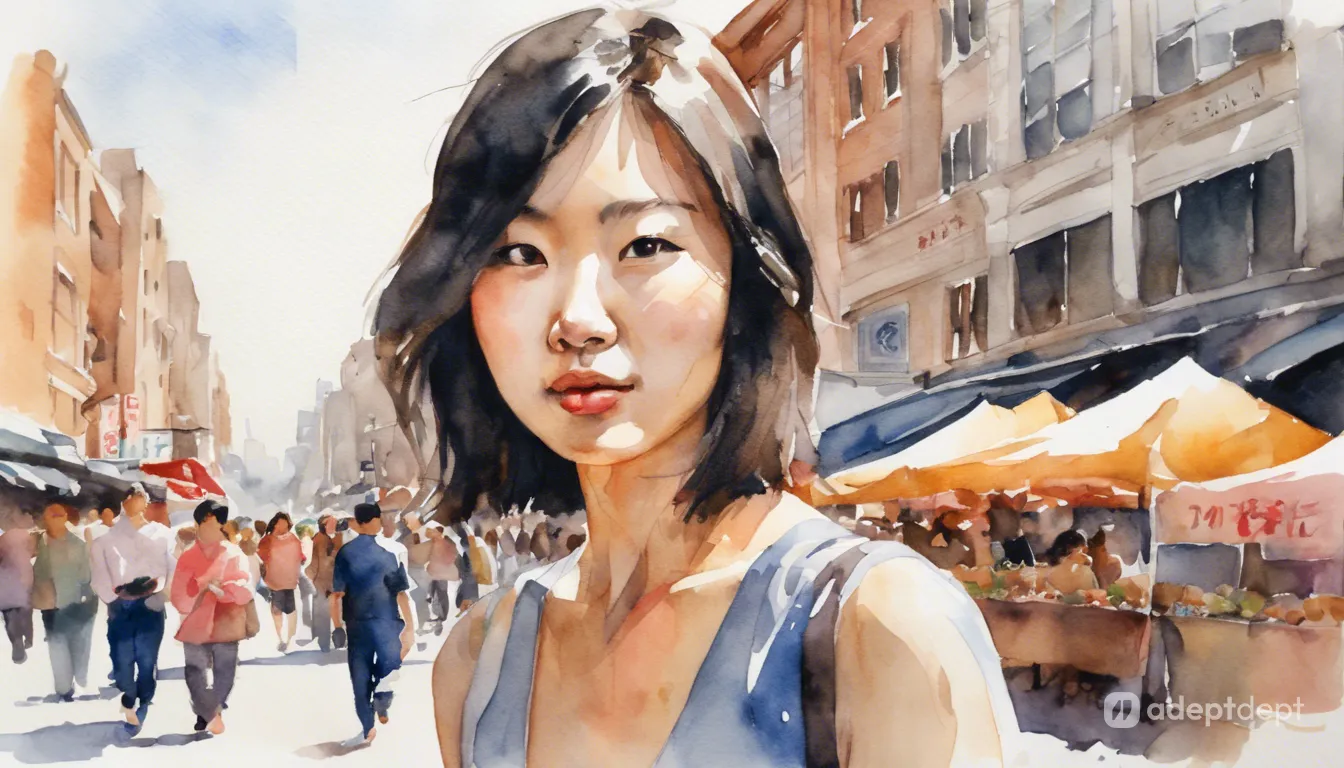
Style: Auto. Prompt: Watercolor portrait of Sujin Kim, a young woman, backdrop of a bustling street fair.
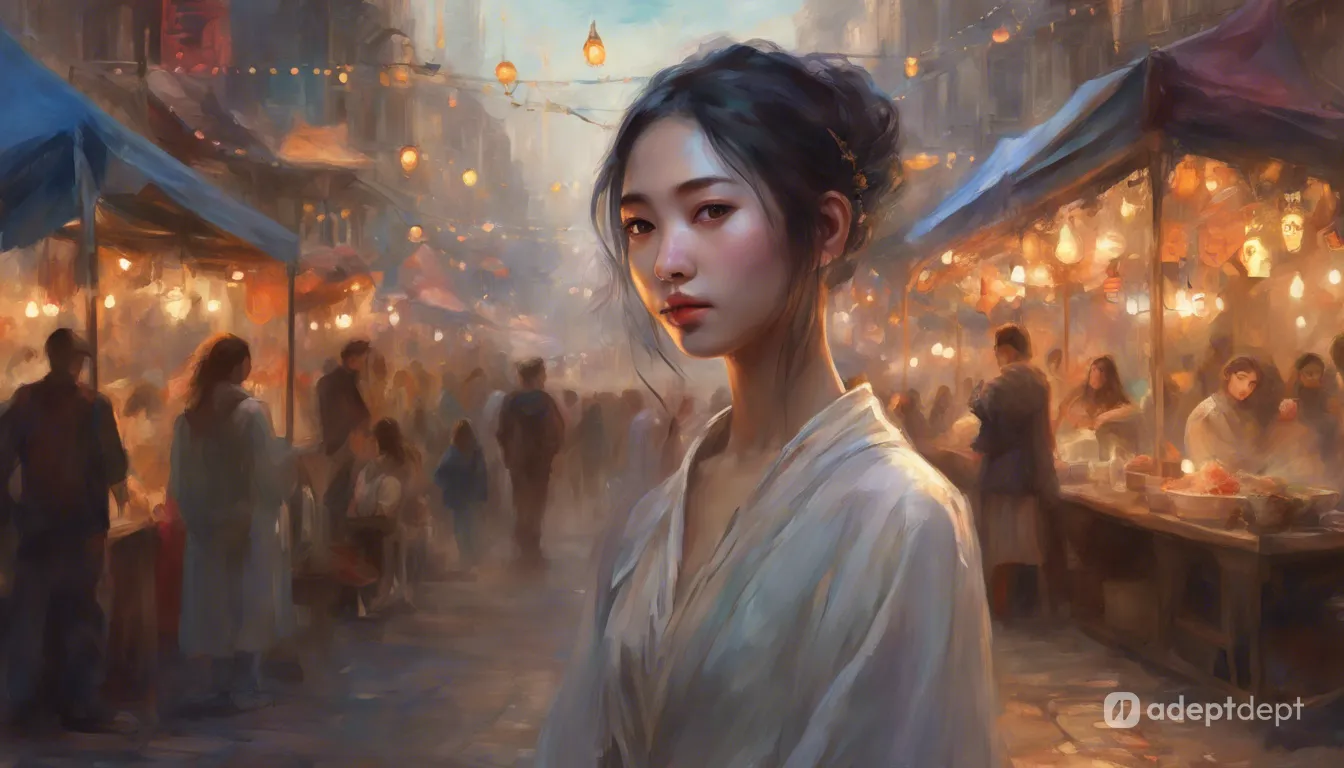
Style: Fantasy Art. Prompt: Portrait of Sujin Kim, a young woman, backdrop of a bustling street fair.
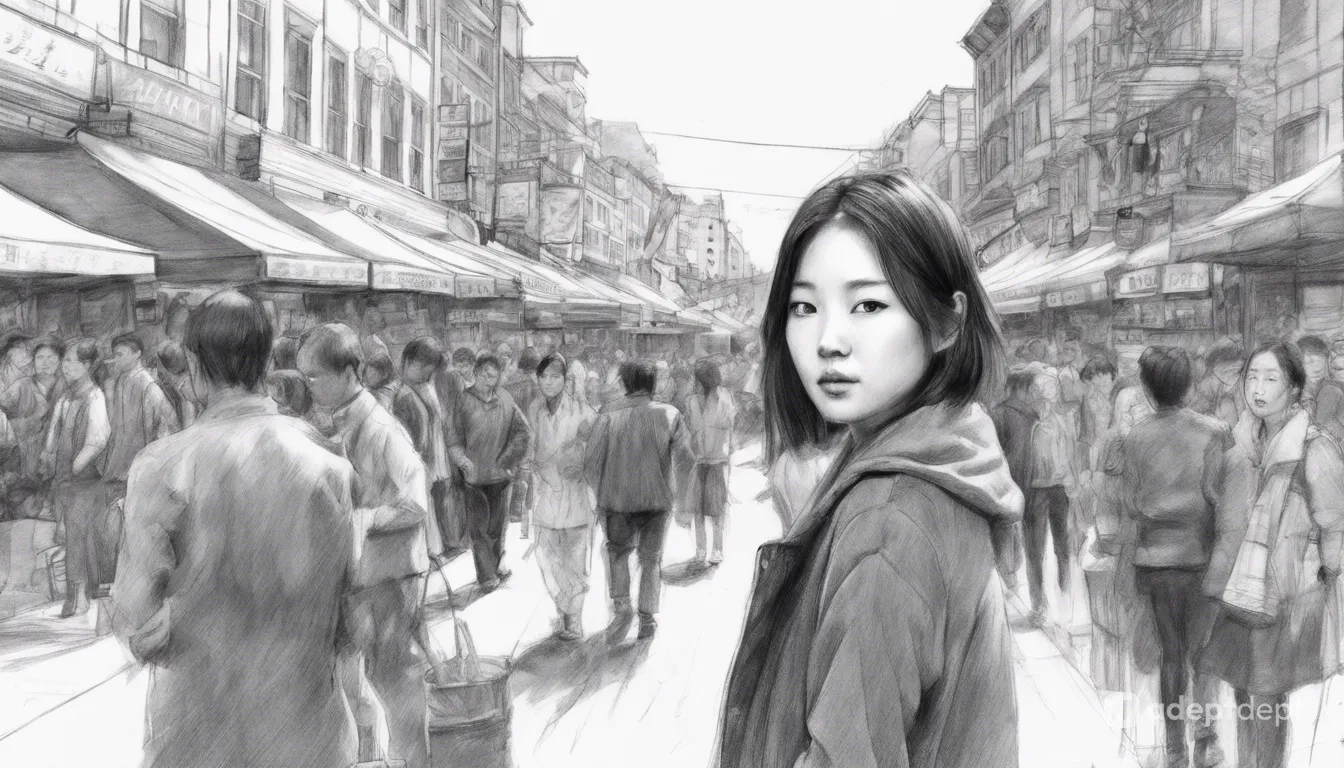
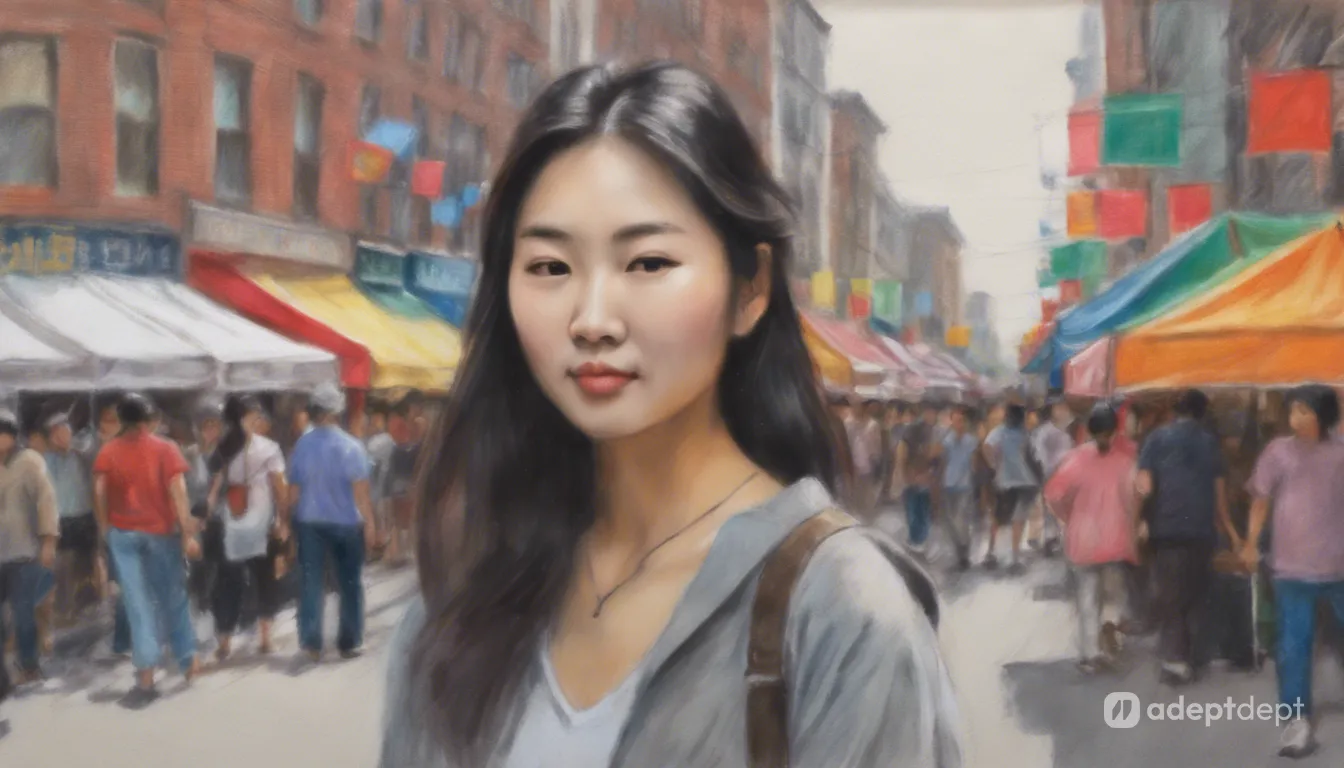
Style: Auto. Prompt: Pencil sketch portrait of Sujin Kim, a young woman, backdrop of a bustling street fair.
Style: Digital Art. Prompt: Portrait of Sujin Kim, a young woman, backdrop of a bustling street fair.
Style: Auto. Prompt: Chalk pastel portrait of Sujin Kim, a young woman, backdrop of a bustling street fair.
The Subject
A clear focal point is key to grabbing the audience’s attention. The subject is star of your visual story! The more specific you describe your subject, the better the AI model will understand your vision.
Physical Description
Describe your subject in detail. Shape, size, how things are positioned — all these details help the AI “see” your vision. Imagine “twisted branches of ancient trees” or a “sleek, curved spacecraft.” The more details you give, the better the AI can capture your idea and create the scene.

Prompt: photo of a large sleek spacecraft on the ground, parked in the middle of a dark forest at night.
Colors
Colors can breathe life into your prompt, influencing the image’s mood and aesthetic. Mention the colors you want, like “warm hues of a sunset” or “cool metal sheen of a cyberpunk city.” Play around with color combinations to set the mood and make your AI art pop.
Today, we won’t be exploring the intricacies of color theory. AI models are trained on tons of images and understand color preferences. People generally like higher color contrast, such as complementary colors or warm and cool colors together. Monochromatic color themes can also evoke certain emotions. Just experiment and see what works best.
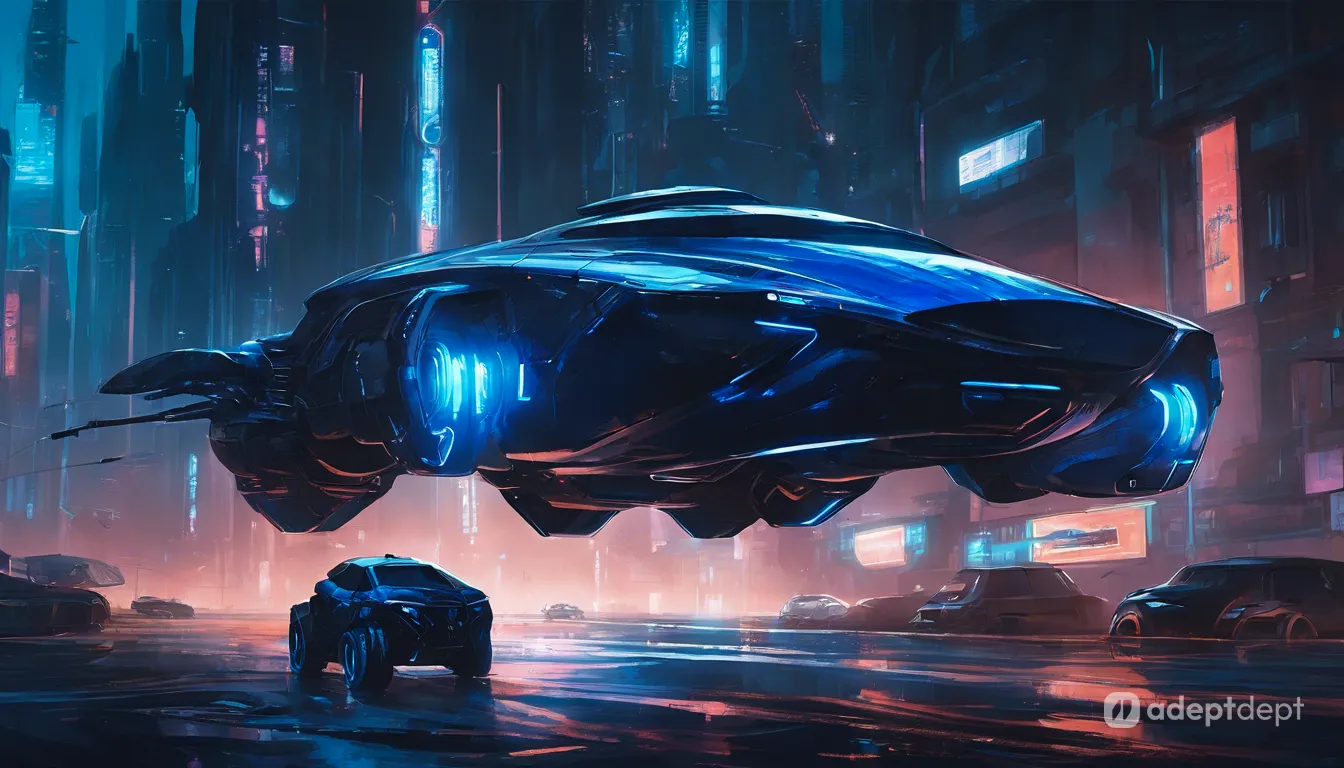
Prompt: Concept art of a dark navy blue futuristic vehicle with a mesmerizing cool, metallic sheen, in a cyberpunk cityscape dominated by shades of electric blue.
Materials
Spice up your scene with textures! Mention materials like “glistening marble floors,” “rustic wooden beams,” or “crystal-clear water” to give the AI something to build on. This adds depth and detail, making your AI art way more interesting to look at.
Think “feel” when it comes to materials. “Glistening marble” feels fancy, while “rustic wood” feels old and cozy. By describing materials, the AI can create a wider range of details, bringing your images to life!
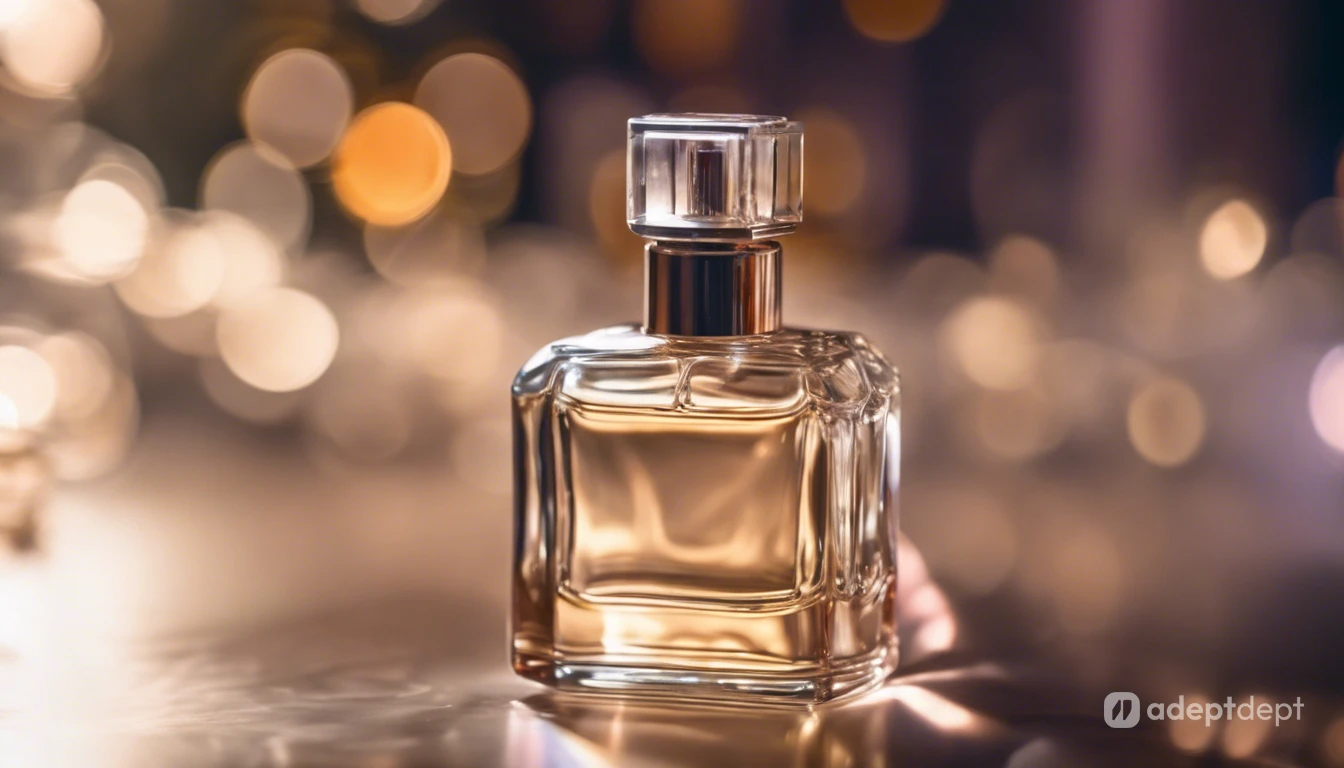
Prompt: A gorgeous perfume bottle made of clear glass, reflecting and refracting light beautifully, simple background.
Orientation
Think about how your subject sits in the scene. This includes its position, how it’s turned, and its size. For multiple subjects, describe how they’re arranged: clustered together or spread out? You can also set the depth by placing your subject in the foreground, middle ground, or background. Clear orientation helps the AI create a balanced image with everything where it should be.
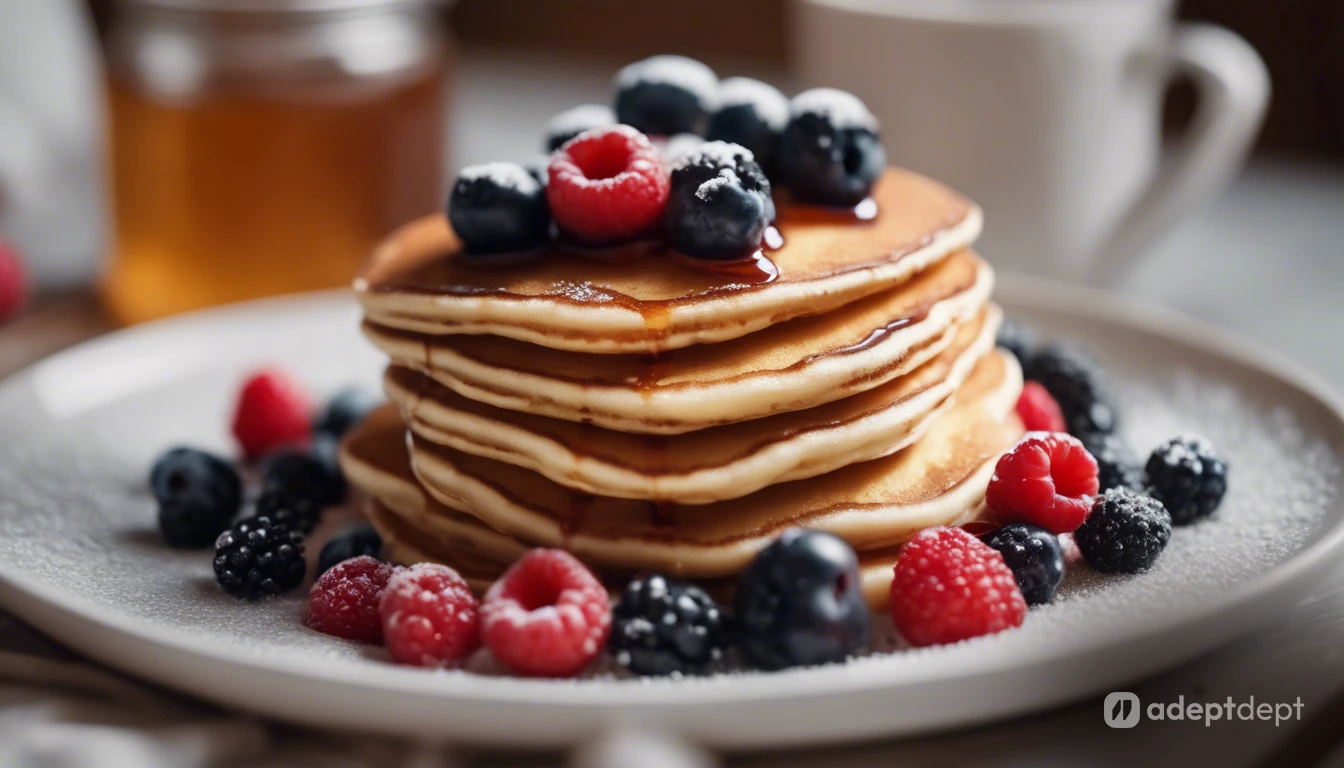
Prompt: A tall stack of pancakes topped with fresh berries, maple syrup, and powdered sugar in center of the midground.
Adjectives
Adjectives are the brushstrokes of language, adding character and emotion to your prompt. Descriptive words like “eerie forest”, “serene seascape”, or “futuristic metropolis” set the mood and feeling of your AI art. Pick words that create the vibe you want.
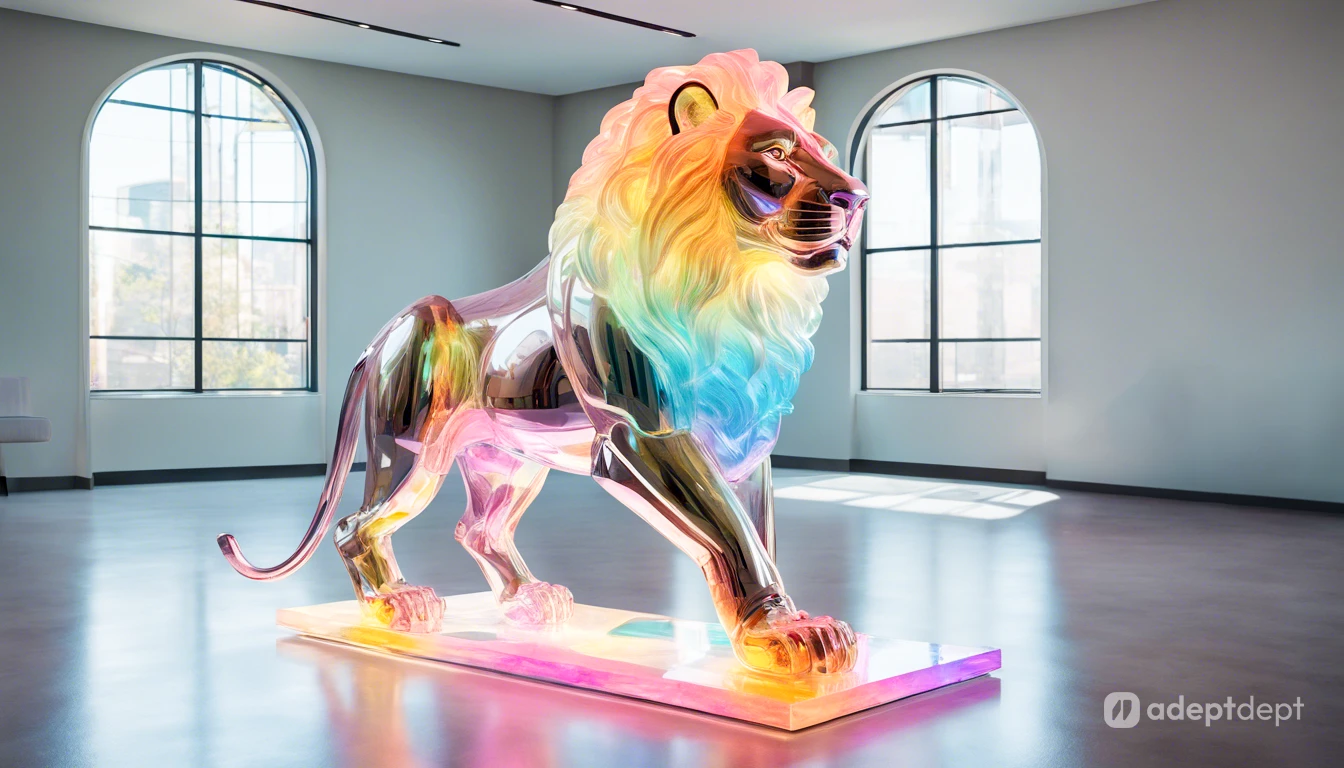
Prompt: A translucent, iridescent, holographic sculpture of a lion with an ethereal glow of rainbow colors, in the center of a futuristic, minimalist home.
The Setting
Set the scene! The environment surrounds your subject and fills the scene. It provides context and grounds the story. Beyond being a mere backdrop, the setting is the stage where your visual story unfolds. Here, you have the power to make your subject stand out or blend in, and even influence the viewer’s emotions.
Location and Environment
Don’t just say “beach” or “forest”. Imagine your scene in more detail and specify the geological location. Is it a tropical beach in the Bahamas with palm trees swaying in the breeze, or a spooky forest in the Pacific Northeast shrouded in mist?
Specifying the location can help the AI incorporate relevant landscape, architectural, ecological, and cultural features to the image. The more specific you are about the location, the more details the AI can add to make your image feel real and interesting.
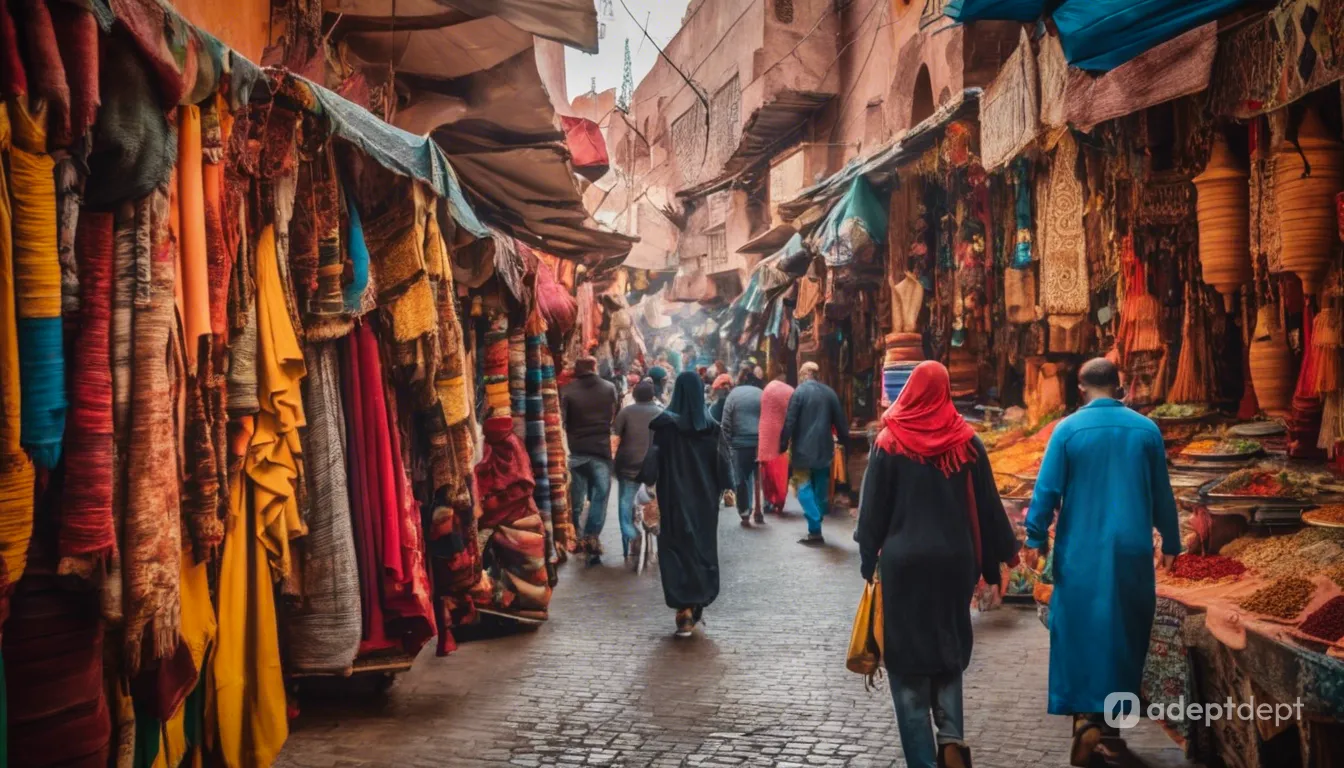
Prompt: People strolling through a vibrant Moroccan bazaar filled with activity, daytime
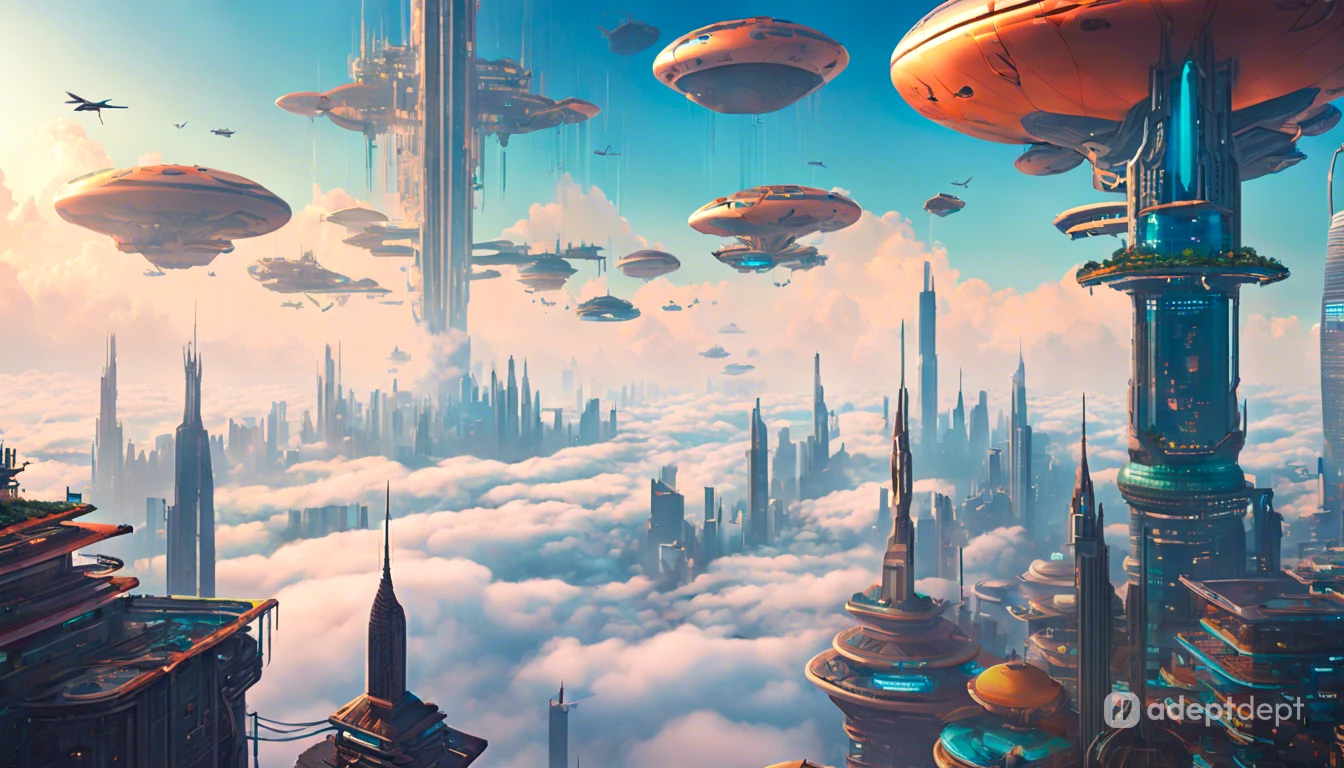
Prompt: A bustling cityscape above the clouds, featuring futuristic skyscrapers and flying vehicles.
Atmosphere and Mood
Same place, different vibes. Even in the same location, elements such as weather, fog, colors, textures, and shapes can change the mood completely. Imagine a log cabin. It might appear cozy on a sunny day, but spooky on a rainy night. Think clear day vs. foggy afternoon, green city park vs. gray concrete jungle, soft pillows vs. jagged rocks. All these details affect how the viewer sees your image.
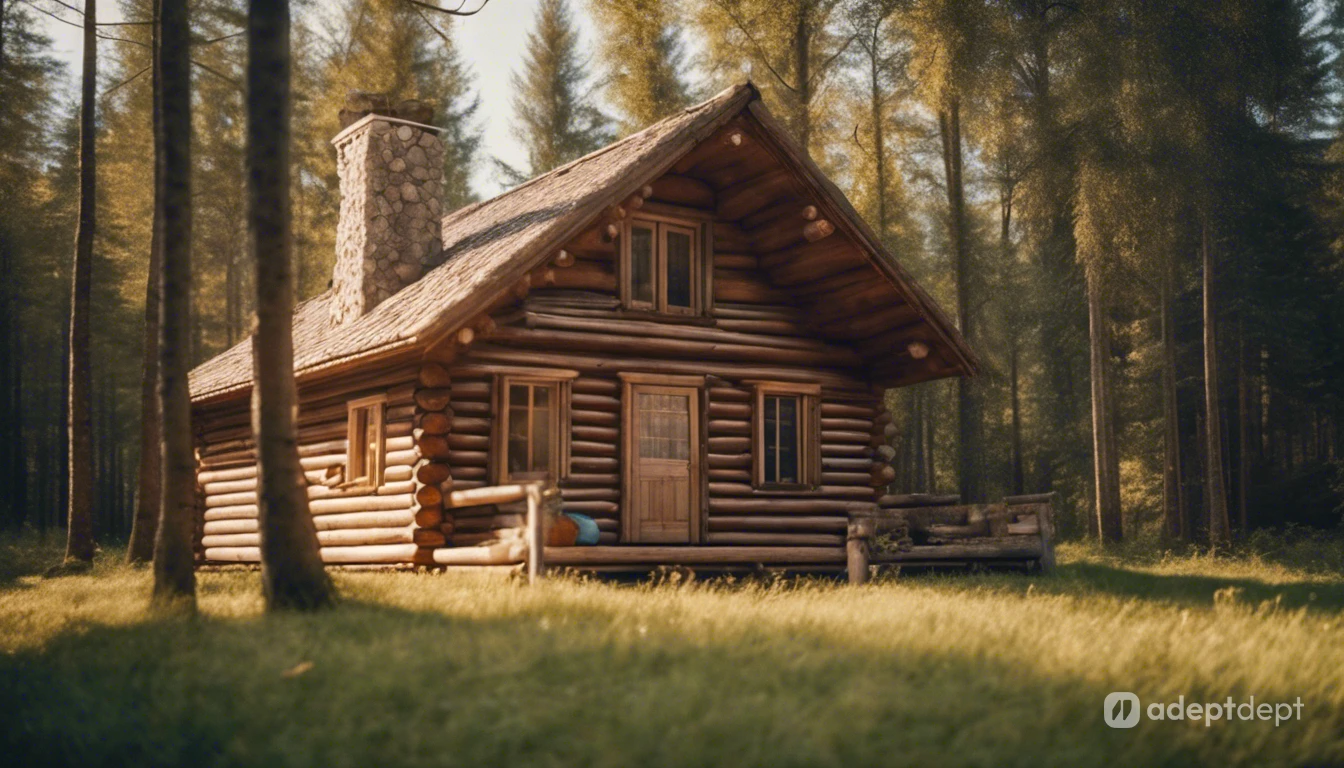
Prompt: A charming log cabin in the forest on a beautiful, sunny day.
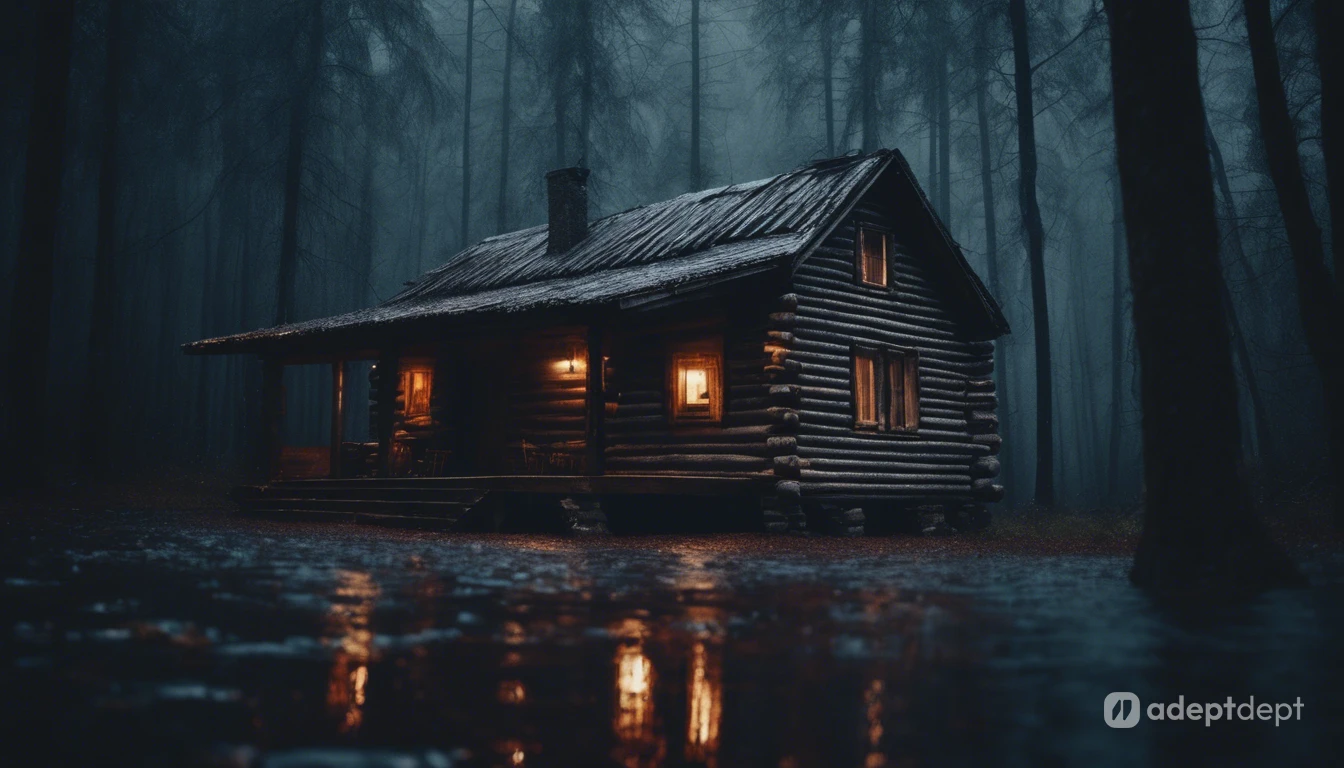
Prompt: A creepy log cabin in a dark forest on a wet, eerie, rainy night.
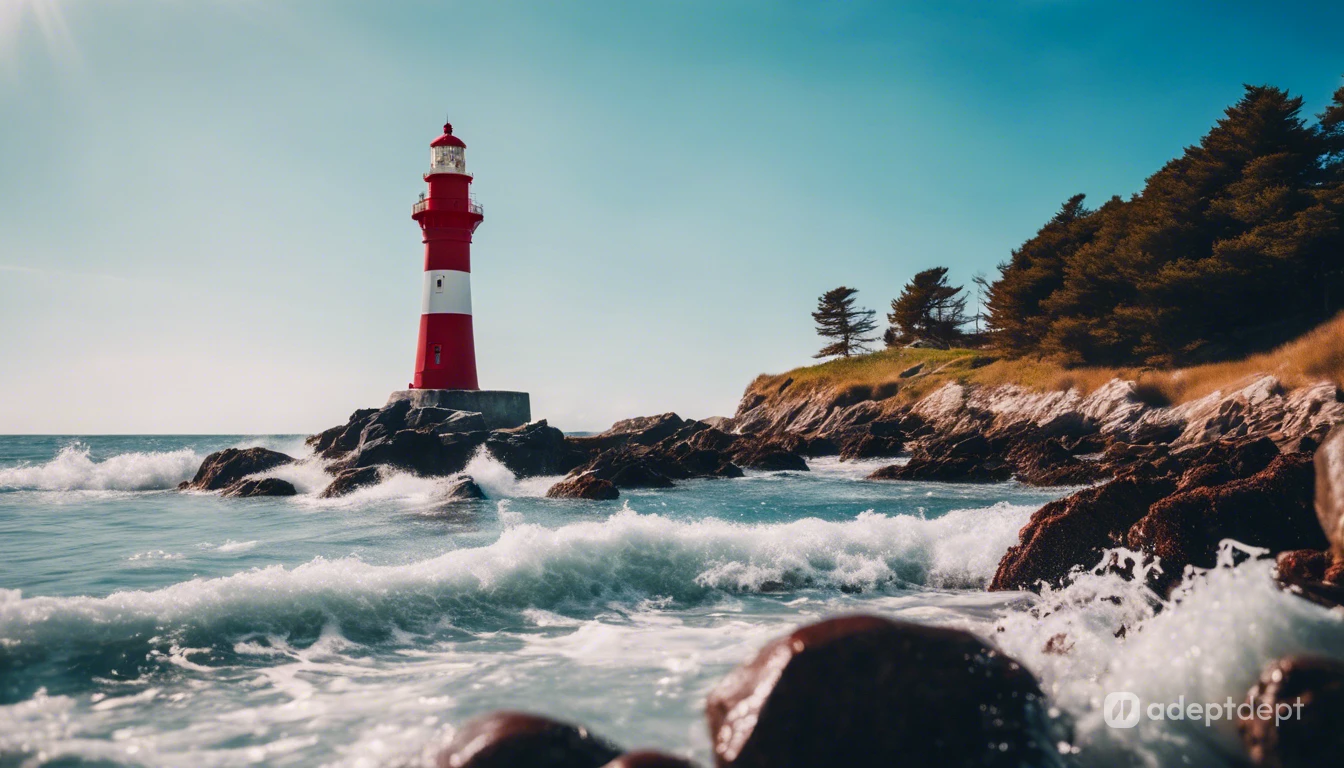
Prompt: A sunny coastal day with waves, a lighthouse, and clear blue skies.
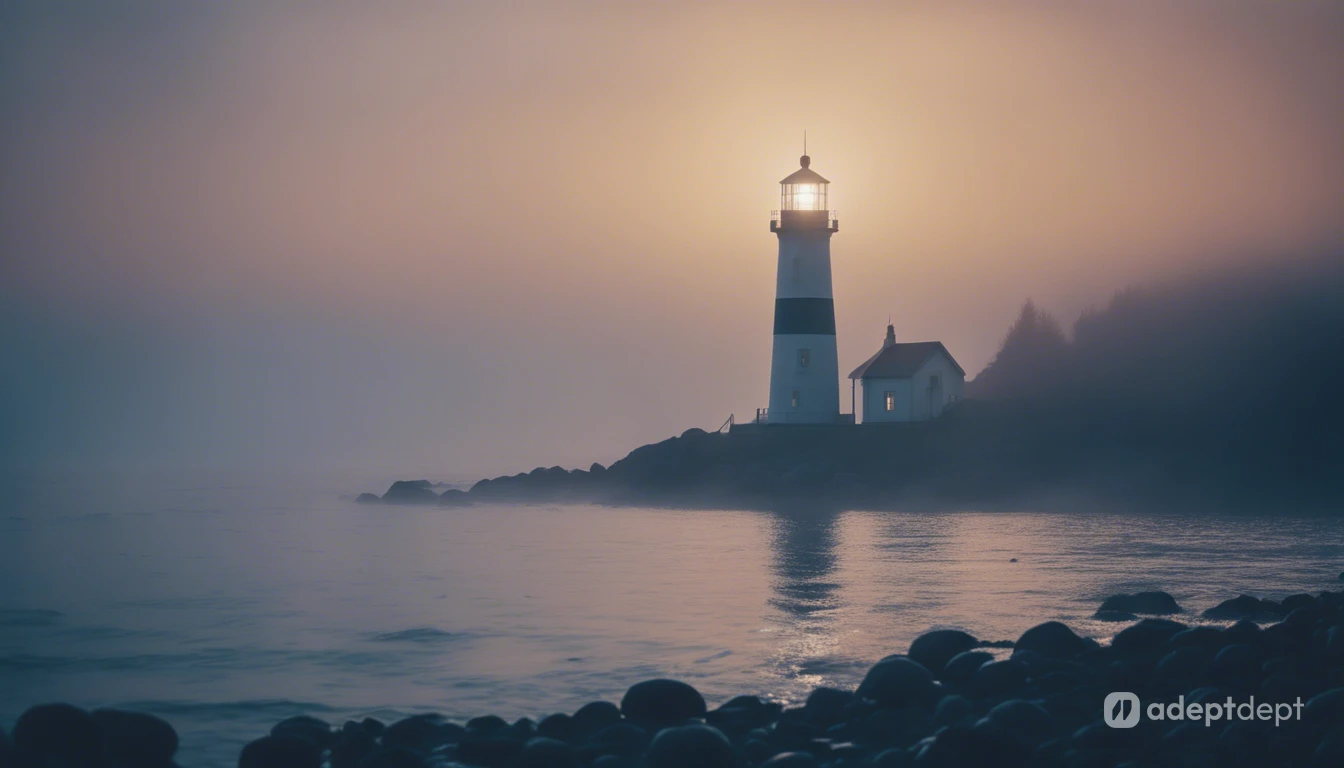
Prompt: A foggy coastal evening with mist, a lighthouse’s beam, and a mysterious seascape.
Foreground, Midground, and Background
Don’t forget how you arrange things. Think of your scene in layers: close up (foreground), middle distance (midground), and far away (background). Using all three layers creates depth, but you can sometimes skip some for a different effect.
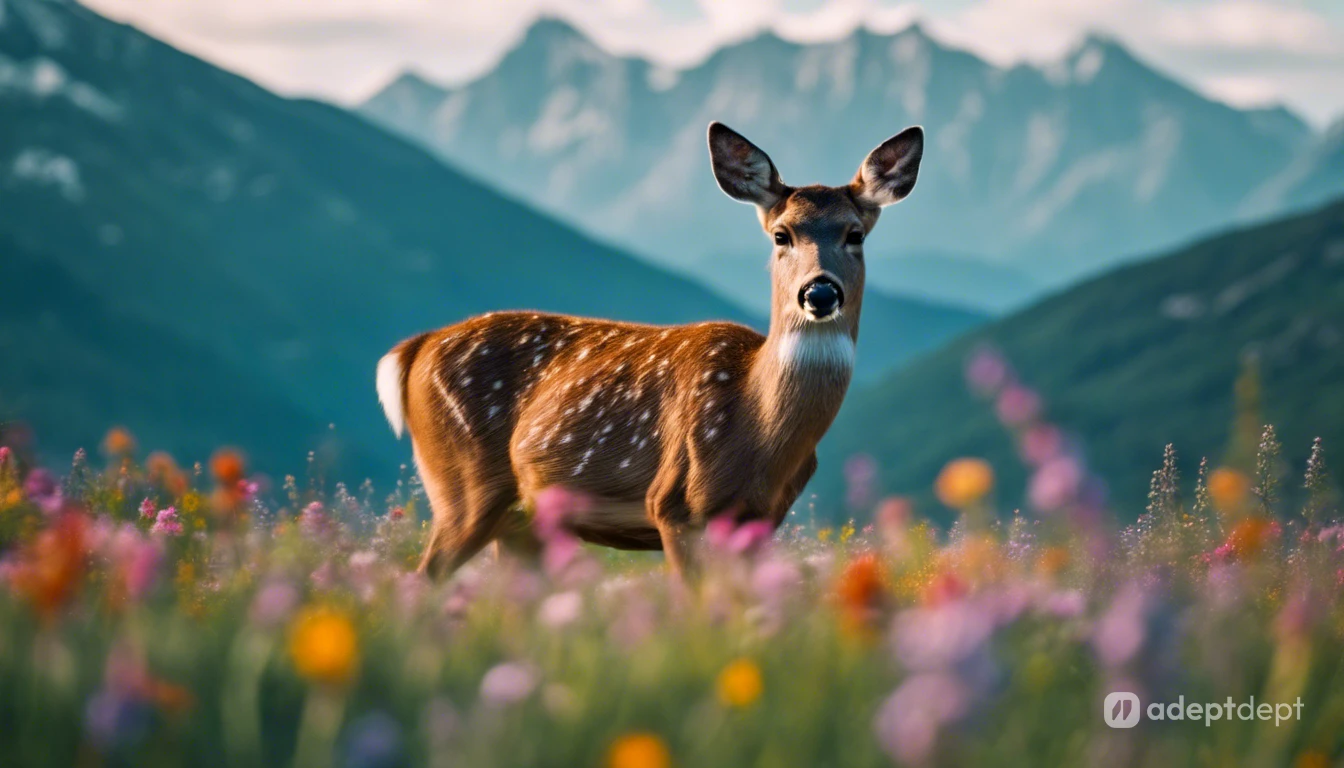
Prompt: A long shot of a deer grazing in the midground during the day, vibrant wildflowers in the foreground, and a mountain range stretching across the background.
Lighting
Let’s talk light! Lighting can totally change the mood of your AI art. This section will show you how to use light and shadows to transform your images into dynamic masterpieces.
Light Source
Lighting can make your image calm or dramatic. Soft, diffused lighting creates a gentle and comfortable ambiance. Sharper, harsher lighting, on the other hand, enhances contrast and drama.
The softness of the light is influenced by three factors: 1. size of the light source, 2. its distance from the subject, and 3. physical diffusers. Here’s a trick: a bigger or closer light makes softer shadows. Think sunshine vs flashlight. Diffusers, like clouds or lampshades, also soften light.
You don’t need to be a lighting expert, but telling the AI if you want “soft sunlight” or “harsh overhead lighting” will make a big difference.
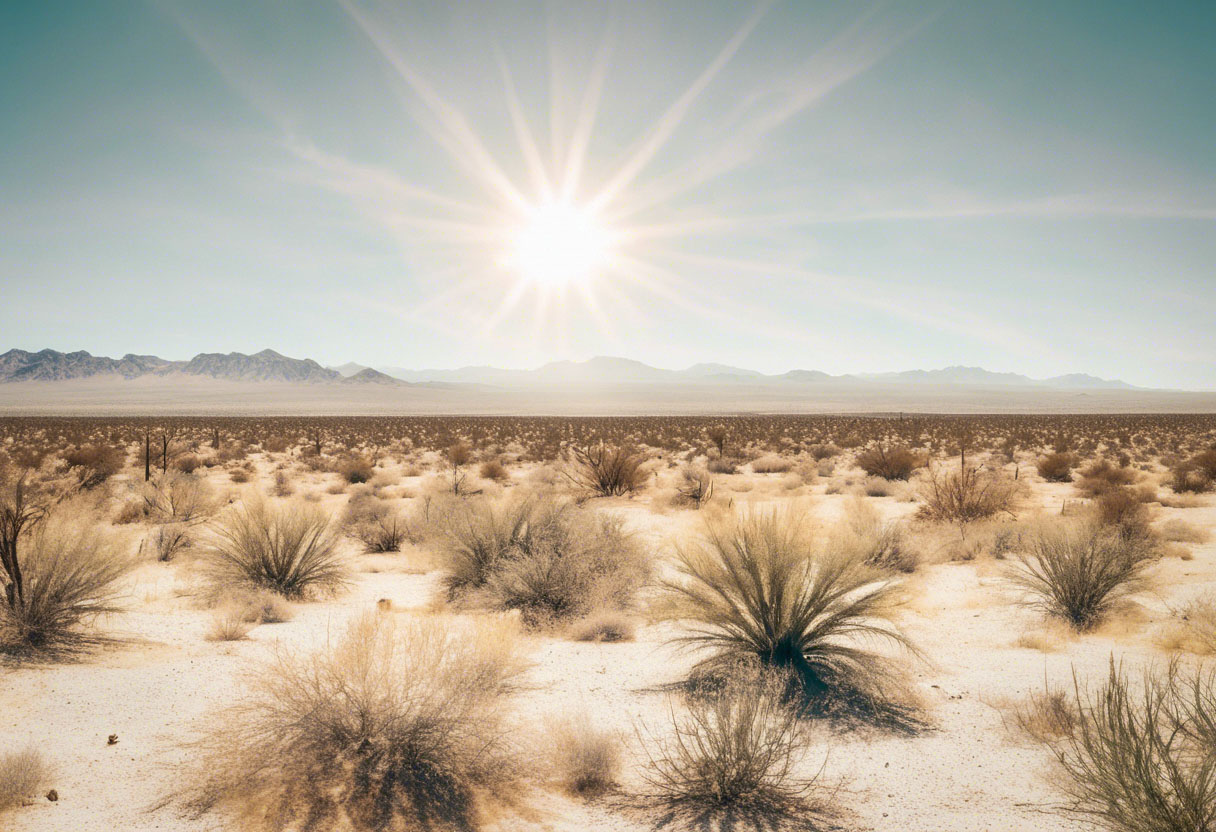
Prompt: Mojave dessert on a scorching day in the afternoon, blinding sunlight beating down, overexposed.
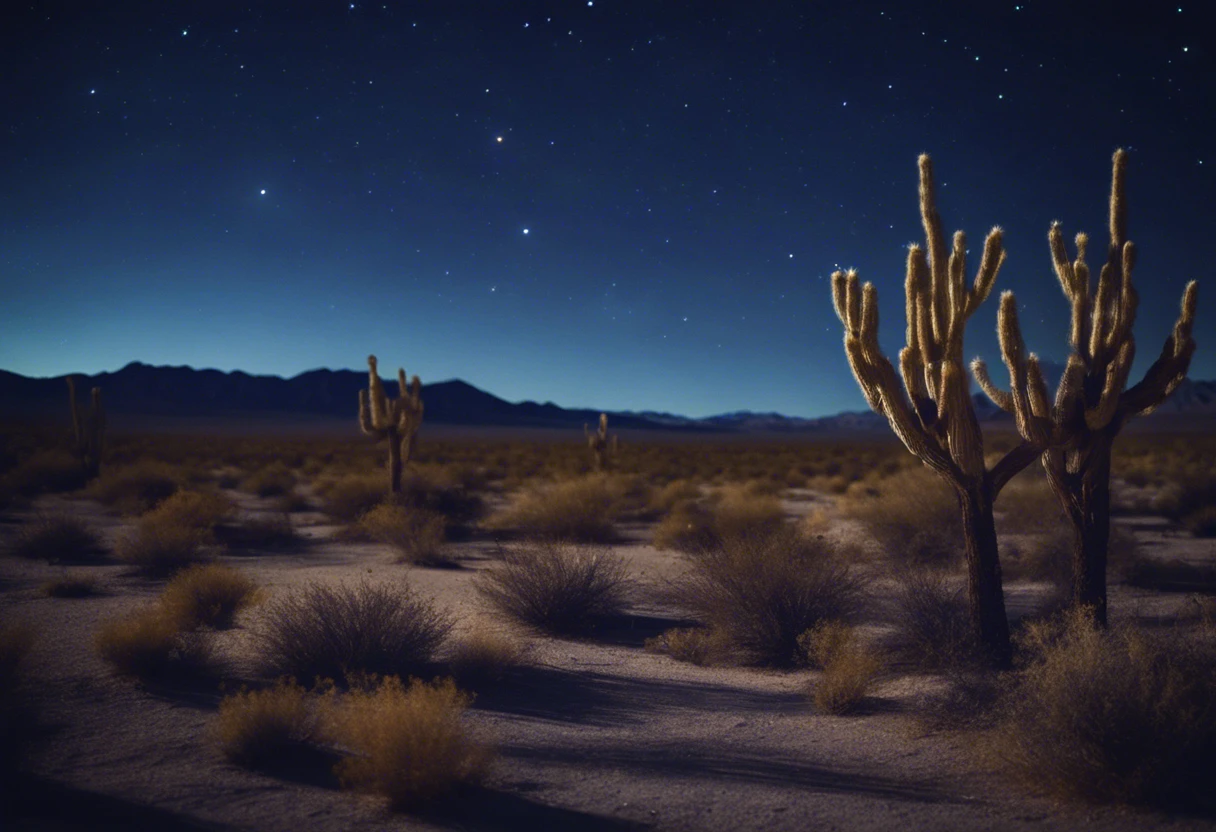
Prompt: Mojave desert on a serene fall night, illuminated by the soft glow of the moonlight deep indigo sky with a few stars.
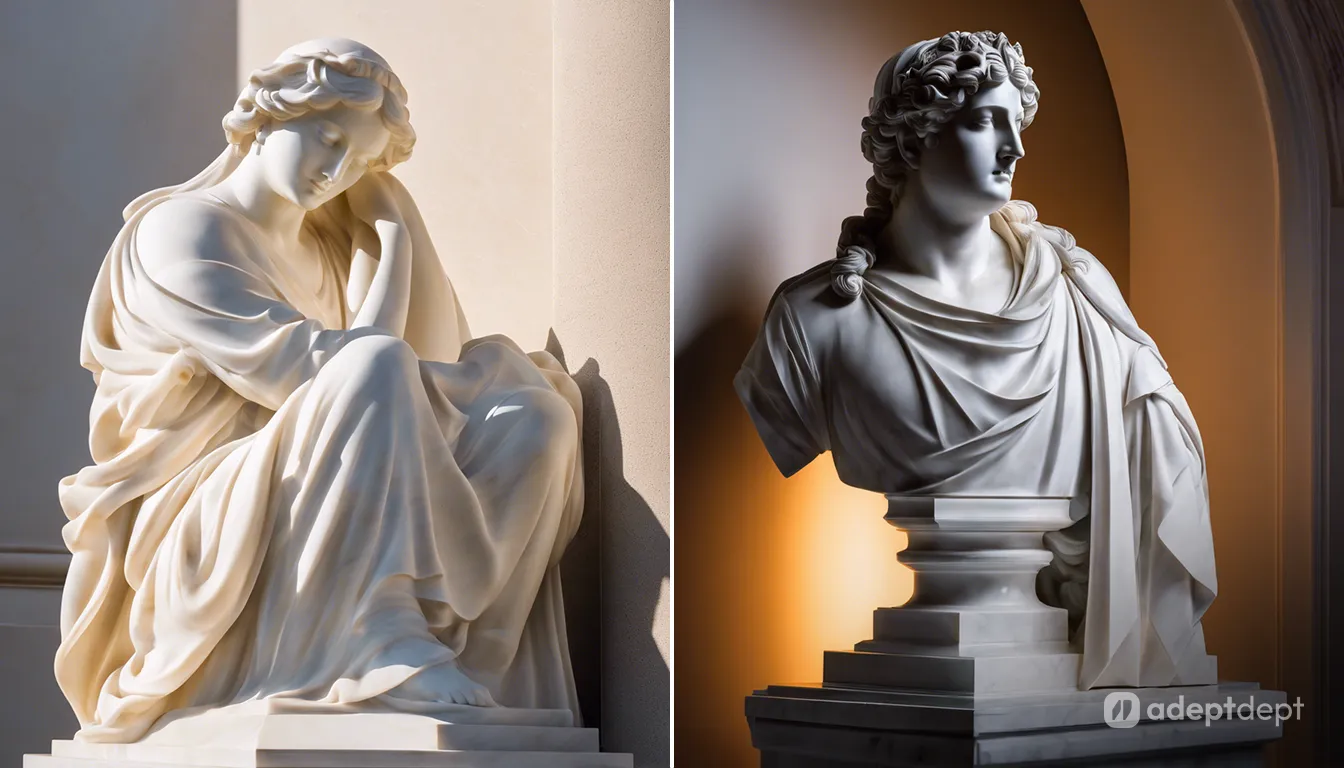
Left Prompt: A marble statue bathed in soft, diffused sunlight, casting gentle hues and emphasizing its smooth contours. Right prompt: A marble statue illuminated by harsh, artificial light, creating dramatic shadows and accentuating its stark features.
Time of Day
The time of day and weather greatly affect sunlight in outdoor scenes. At noon, sunlight is harsh, creating overexposed highlights and deep shadows. On cloudy days, the light is softer and more flattering for people. At dawn and sunset, the angled sunlight creates beautiful orange hues, known as the “golden hour” in photography.
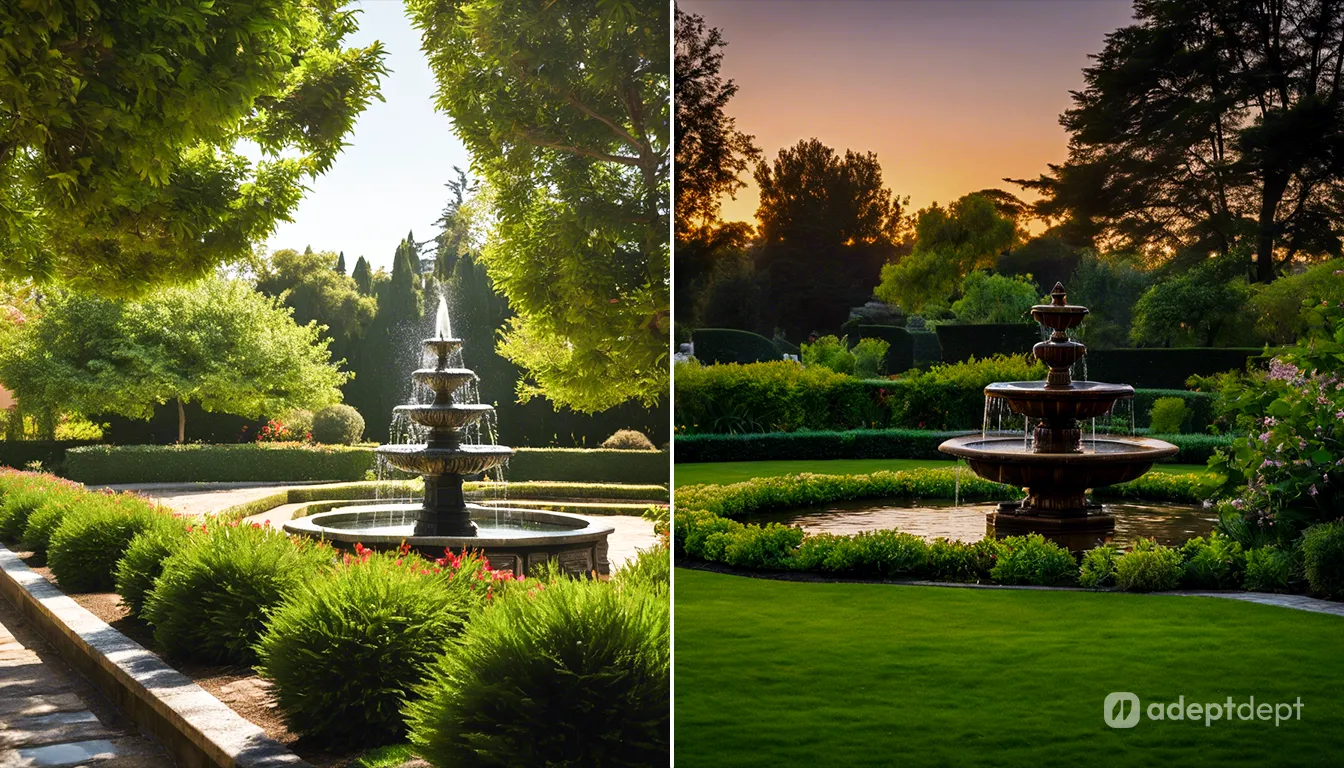
Left prompt: A water fountain in a garden at noon. Right prompt: A water fountain in a garden at dusk.
Viewing Distances
Imagine zooming in or out with a camera. Wider shots show more of the scene, while close-ups focus on details. Be clear with your words — “wide” in AI art might mean different things than in photography. Try different options to see what works best for the AI.
Extreme Long Shot (Extreme Wide Shot)
An extreme wide shot, also called an extreme long shot, captures vast landscapes or sprawling cityscapes. This view sets the stage for your image, letting viewers see the big picture. Think epic mountain ranges or a bustling city skyline. This shot is great for introductions or showing off a grand setting.
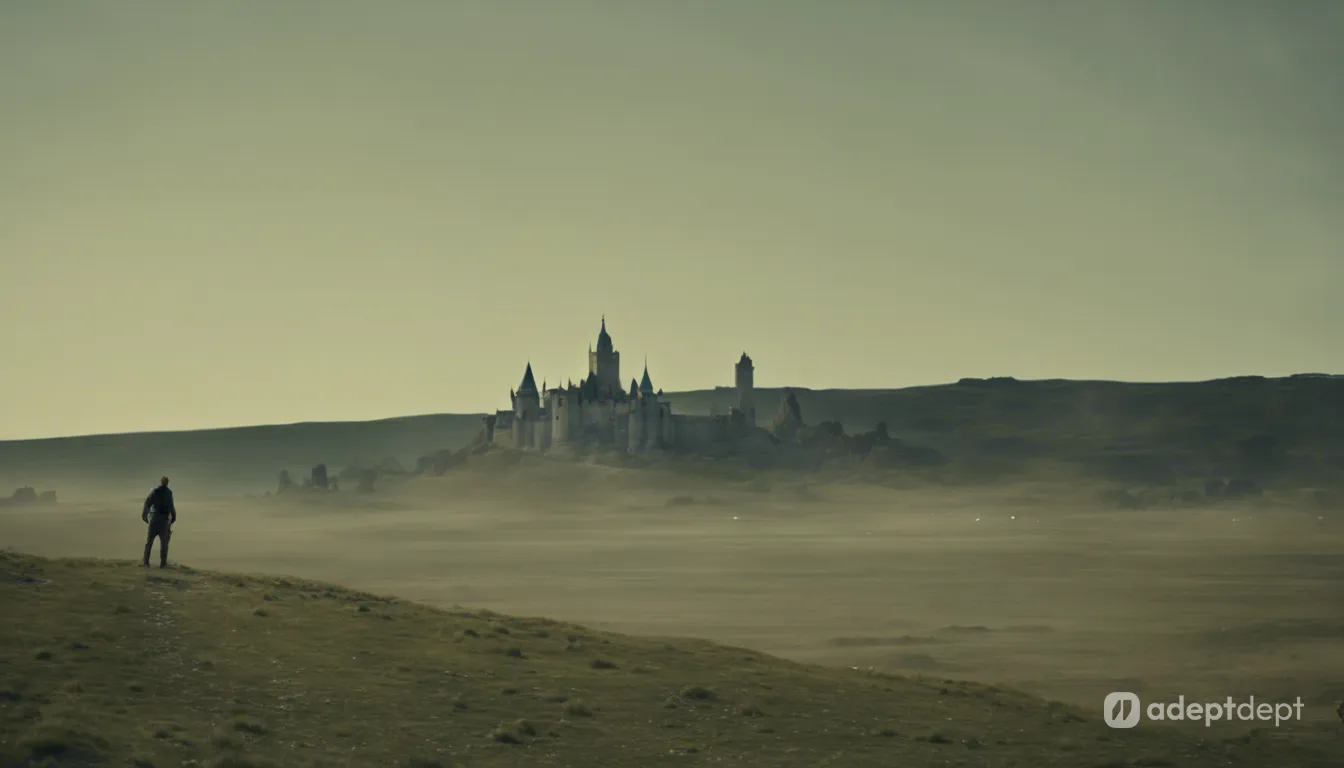
Prompt: Extreme Wide Shot of a person standing extremely far away in a vast, fantastical landscape with a distant castle on the horizon.
Very Long Shot (Very Wide Shot)
The Very Long Shot extends the narrative canvas, providing a wide view to capture extensive landscapes or intricate environments. Its purpose is to establish context and immerse the viewer in the broader setting. This shot is ideal for showcasing majestic landscapes or intricate architecture.
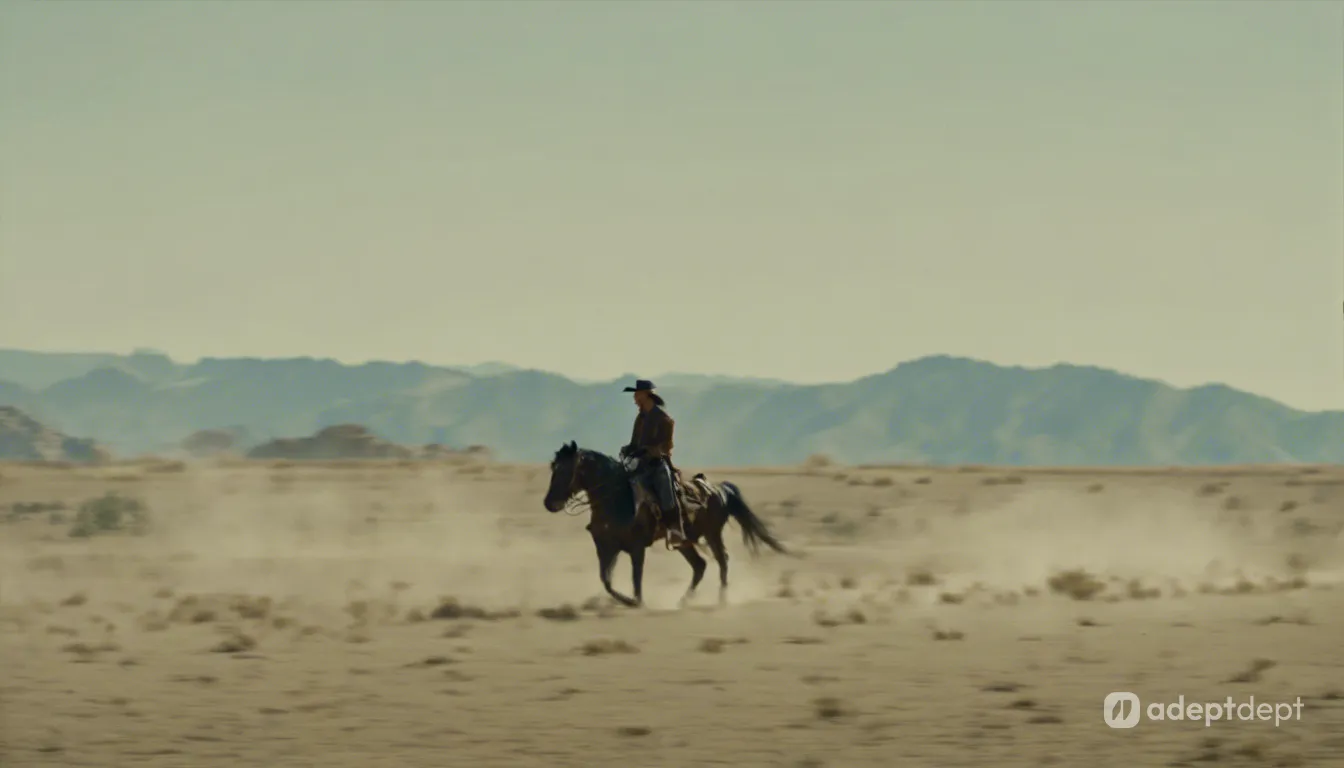
Prompt: Very Long Shot of a lone cowboy riding a horse very far away in a Western landscape, under the expansive sky.
Long Shot (Wide Shot)
A Long Shot shows the subject within its surroundings, offering a full view. It’s great for illustrating spatial relationships, action, or presenting characters in their environment. This type of shot is commonly used in film and photography to establish locations and introduce characters.
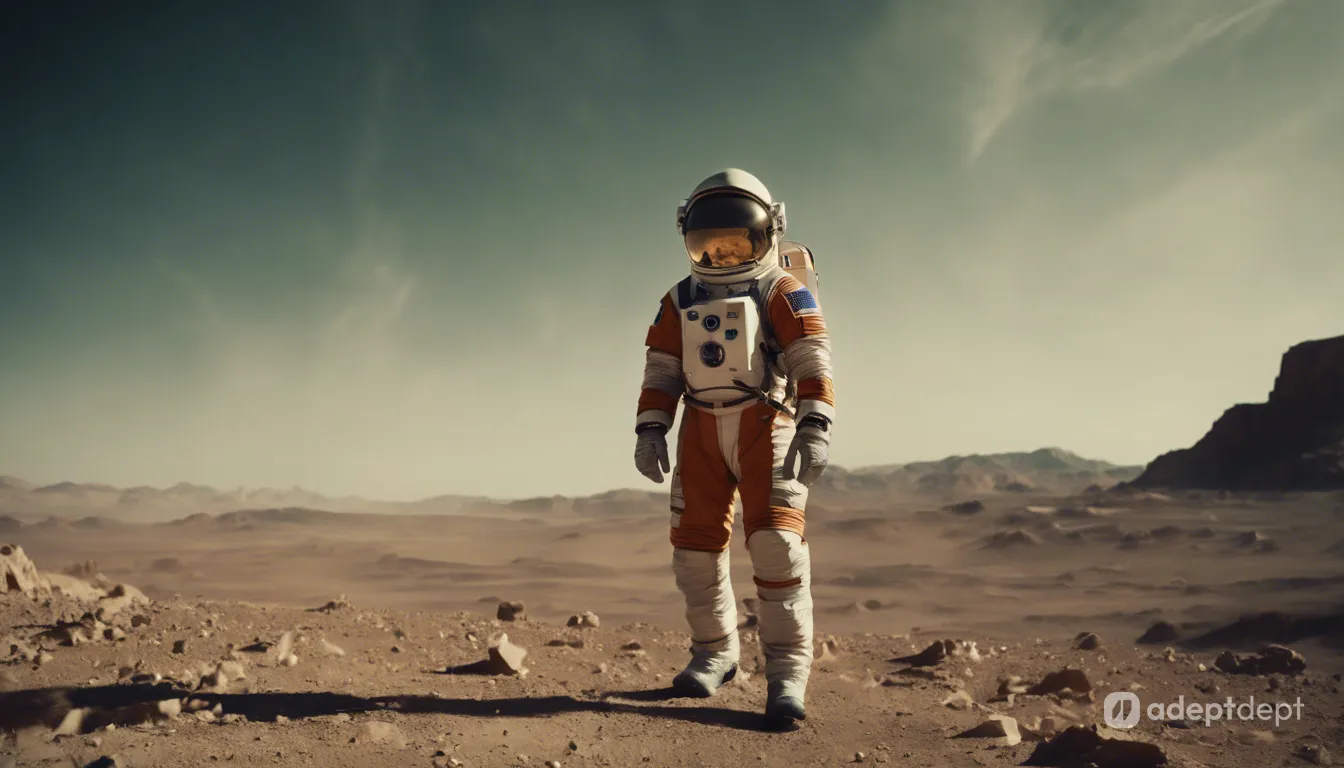
Prompt: Long Shot of an astronaut far away in a Martian landscape, under an otherworldly sky.
Full Shot
A full shot shows your subject completely, from head to toe. This shot is great for showing off clothing, body language, and how a character interacts with their environment.
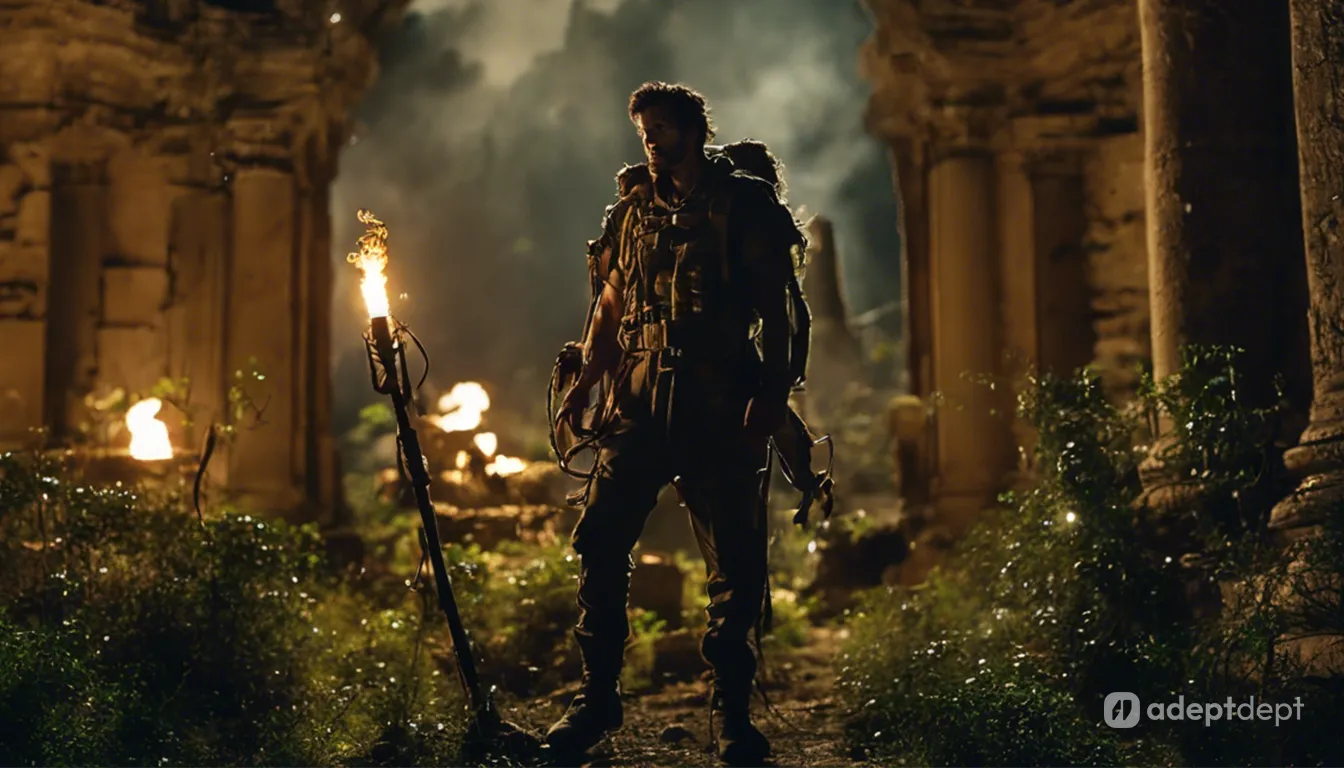
Prompt: A full shot of an explorer with a torch in ancient ruins at night, surrounded by ancient architecture and overgrown vegetation.
Medium Long Shot (Medium Full Shot)
Slightly closer than a full shot, the medium long shot frames the subject from the knees up. This perspective offers intimacy while still showing the subject’s body and posture clearly. It strikes a balance between capturing details and providing context within the scene.
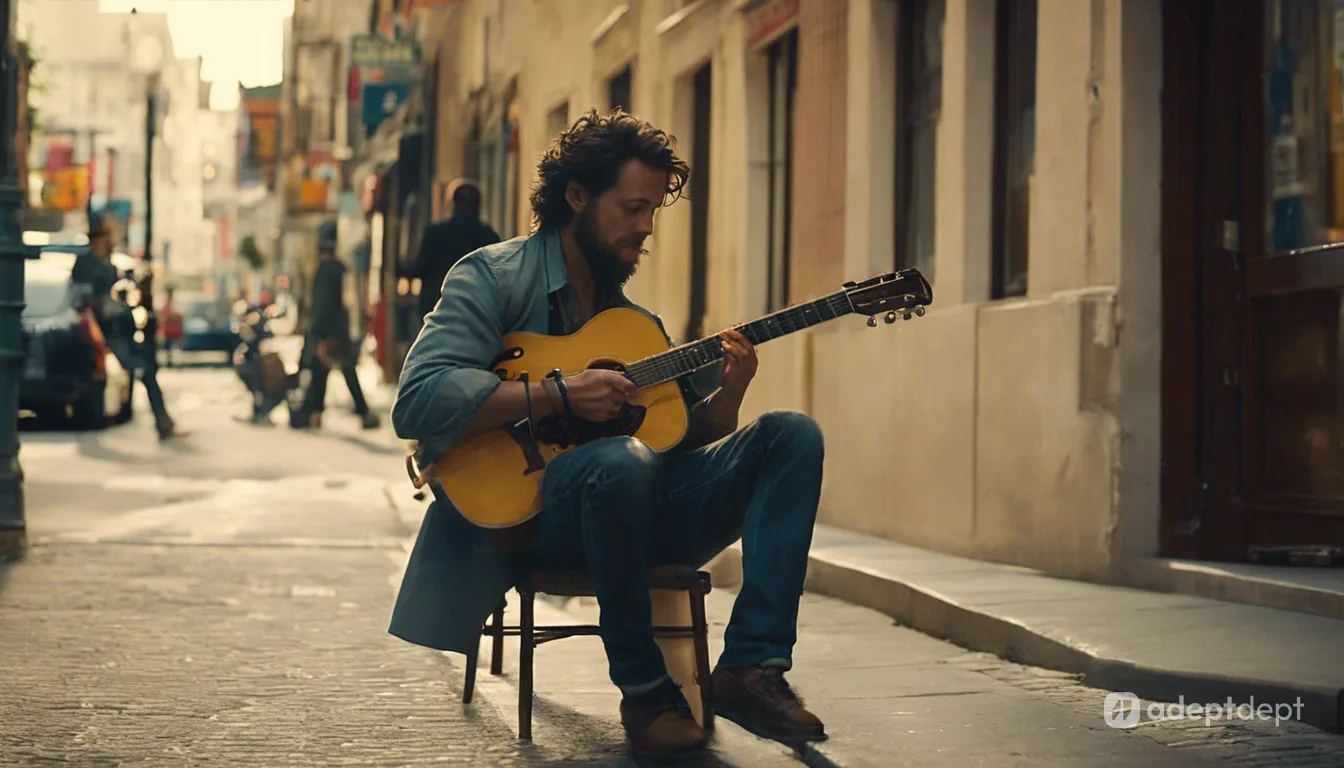
Prompt: A medium full shot of a musician playing a guitar on a city street.
Medium Shot
A medium shot frames the subject from the waist up,highlighting facial expressions and body language. It’s great for scenes that need a moderate level of intimacy while preserving context. Viewers can connect with the person in the scene and still see a bit of what’s happening around them.

Prompt: A medium shot of an artist sculpting clay in a cozy art studio.
Medium Close-Up Shot
The medium close-up shot focuses on the subject’s face and upper torso. This view distance is ideal for conveying emotions and subtle expressions. Viewers can see their facial expressions and some of their body language, creating a more intimate connection.
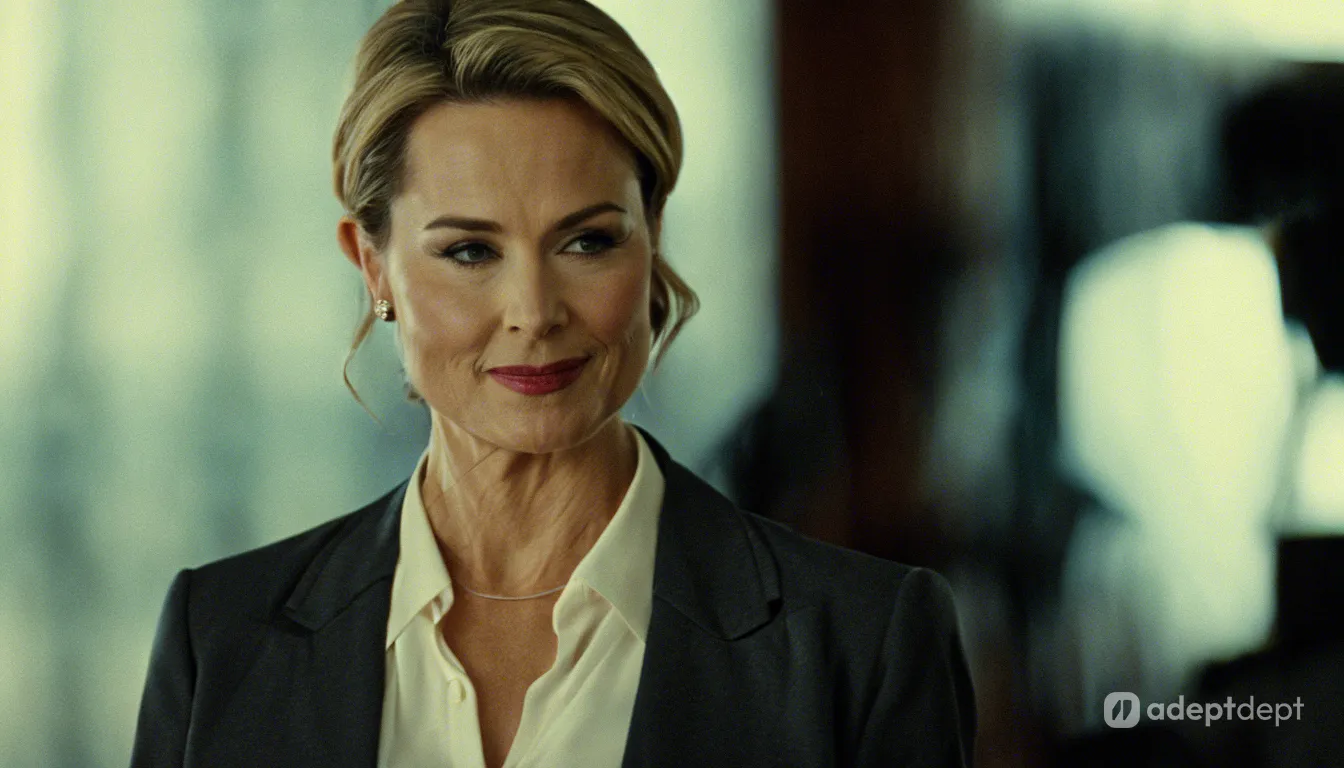
A medium close-up shot of a business professional standing in a meeting.
Close-Up Shot
A close-up shot focuses directly on the subject’s face, capturing detailed expressions and emotions. It’s a powerful tool for creating intimacy and emphasizing specific features. This shot is often used in emotional or impactful scenes, allowing the audience to focus on the nuances of the character’s feelings.
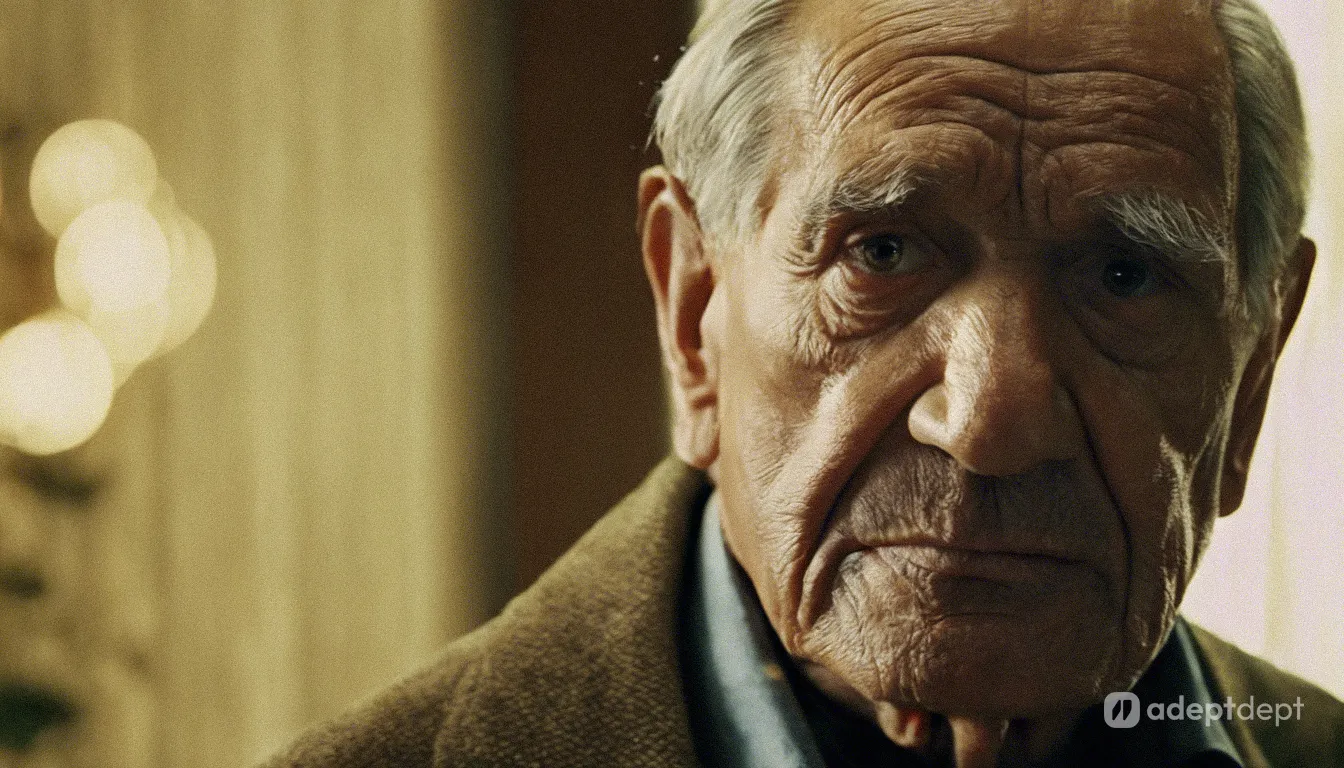
Prompt: A close-up shot of a weathered face of an elderly person, wisdom and life experiences etched in every wrinkle.
Extreme Close-Up Shot
An extreme close-up shot zooms in on small details, focusing intensely on a specific part of the subject like the eyes or hands. It enhances emotional impact and highlights intricate elements. This shot is used to heighten tension, intimacy, or draw attention to specific details, creating a visually intense experience.
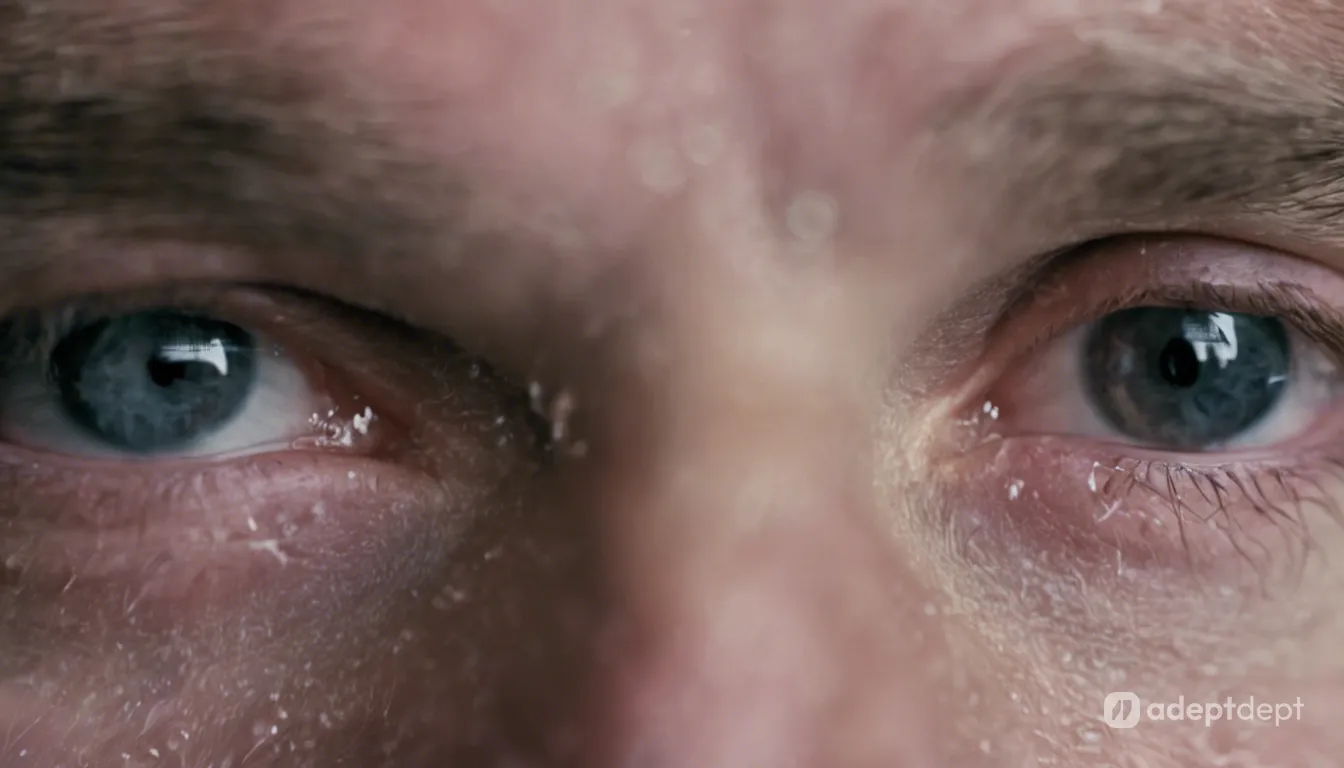
Prompt: An extreme close-up shot of a person’s eyes welling up with tears.
Viewing Angle
While shot distance defines the space between the subject and the viewpoint, the viewing angle indicates the vertical relationship between them. Put simply, it describes whether the viewpoint is above, at the same level, or below the subject.
Top-Down View (90°)
The top-down view captures a scen from directly above, providing a bird’s-eye perspective. This viewpoint is often used to show spatial relationships and layouts. It’s especially effective in scenarios like architectural plans and maps where an overhead view offers clarity and context.
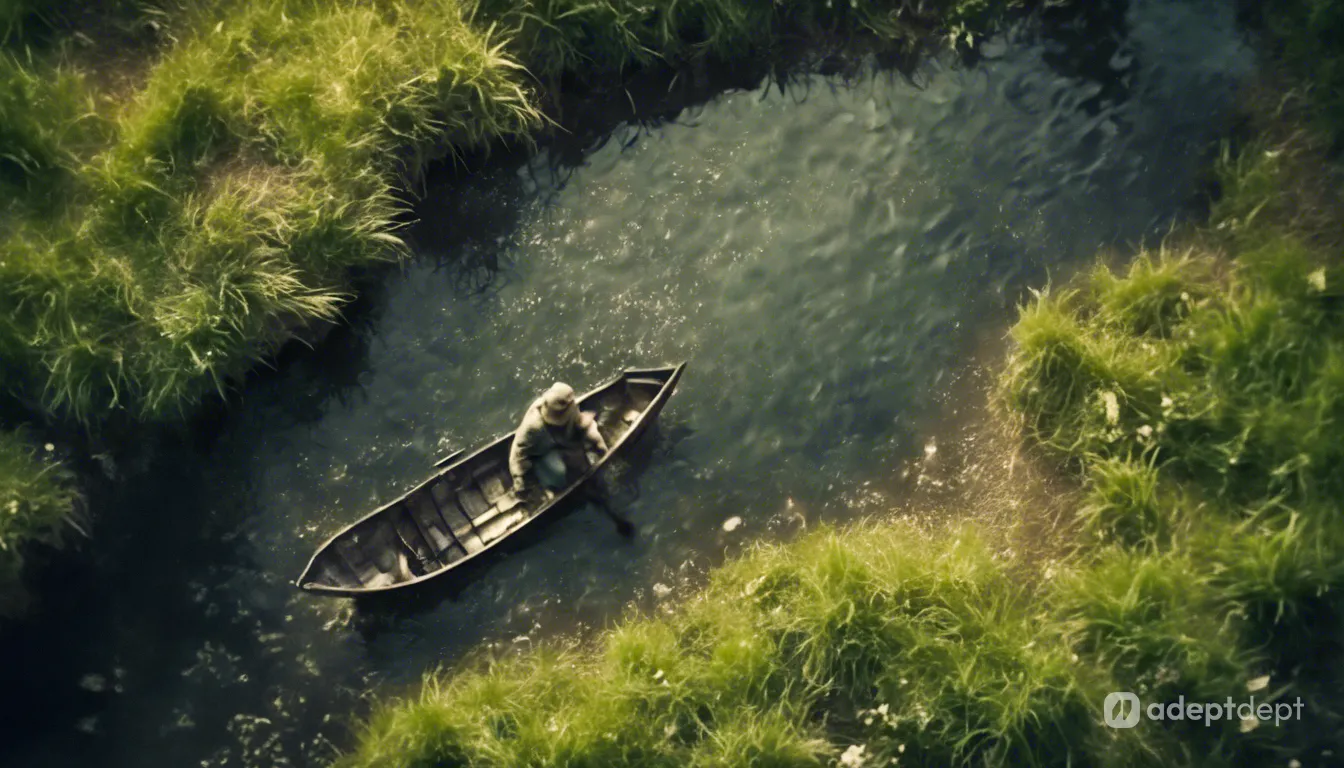
Prompt: Top down view of a boat fisherman on a crystal-clear river lined with green shrubs.
High Angle View(45°)
A high-angle view looks down on the subject from an elevated position. This view can make them appear small, insignificant, and vulnerable. The angle can emphasize the subject’s surroundings and set the mood.
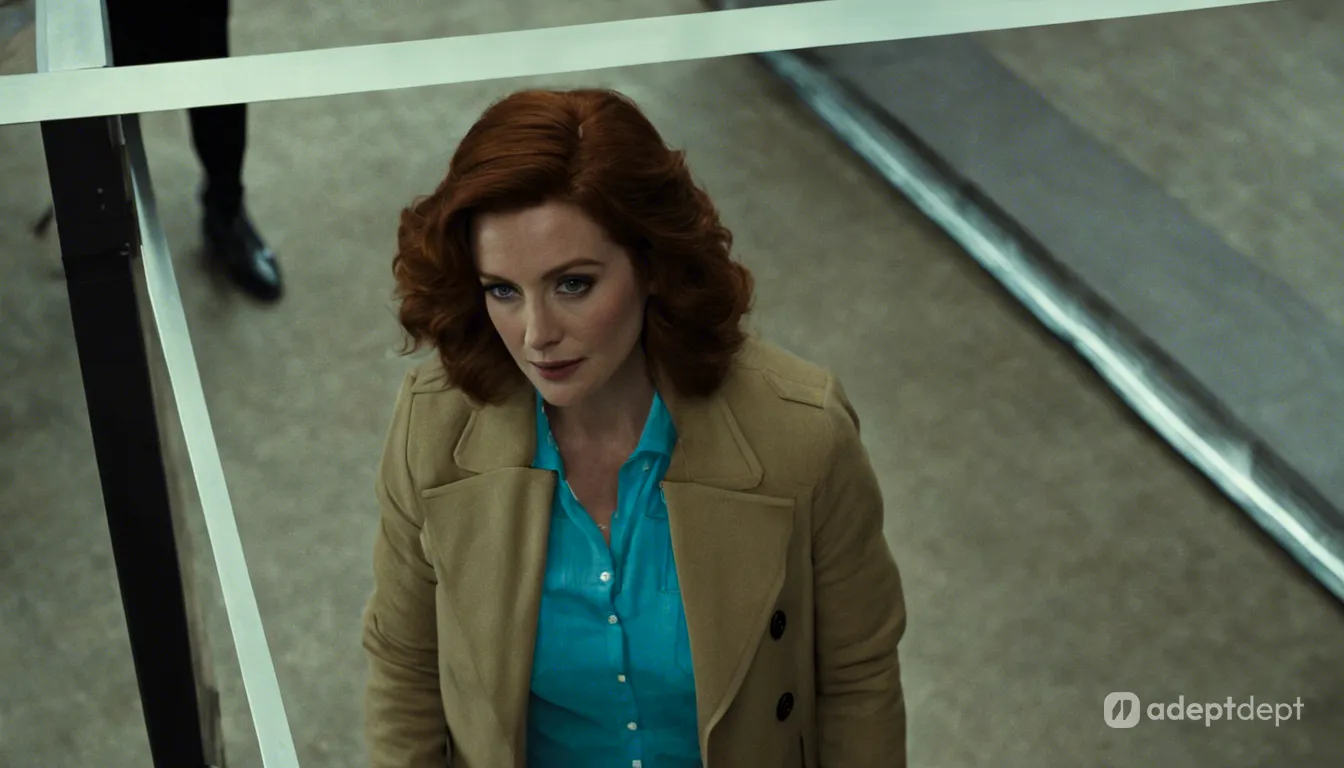
Prompt: high-angle shot 45-degree from above photo a woman standing and looking up at the camera from a distance, expression of uncertainty.
Eye-Level View (0º)
The eye-level view positions the camera at the same level as your subject’s eyes. This creates a natural and balanced view, perfect for portraits, interviews, or any scene where you want a direct connection between the viewer and the subject.

Prompt: eye-level view of a cheerful black man with a friendly smile, wearing light blue oxford shirt, city background.
Low Angle View / Hero Shot (-15°)
A low-angle shot positions the camera below your subject, making them look taller and more powerful. This “hero shot” is perfect for introducing important characters or emphasizing moments of triumph.
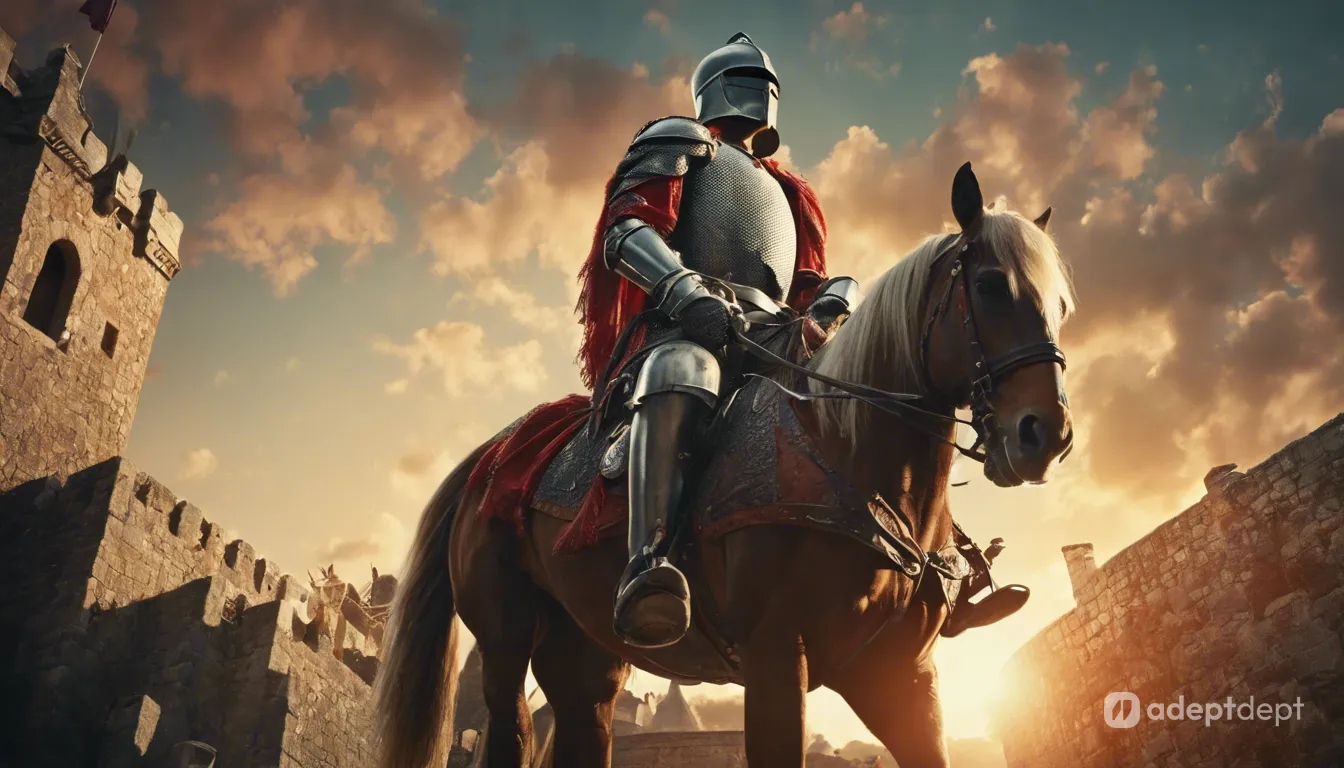
Prompt: low-angle view of a heroic knight on horseback exiting a castle gate, against a vibrant sunset-lit sky.
Extreme Low-Angle Shot — Worm’s Eye View (-60°)
This shot looks up at your subject from an extremely low angle, like you’re lying on the ground. It can make them seem giant and powerful, or create a sense of awe and wonder. Use this shot carefully, as some AI models might not understand “worm’s eye view.”
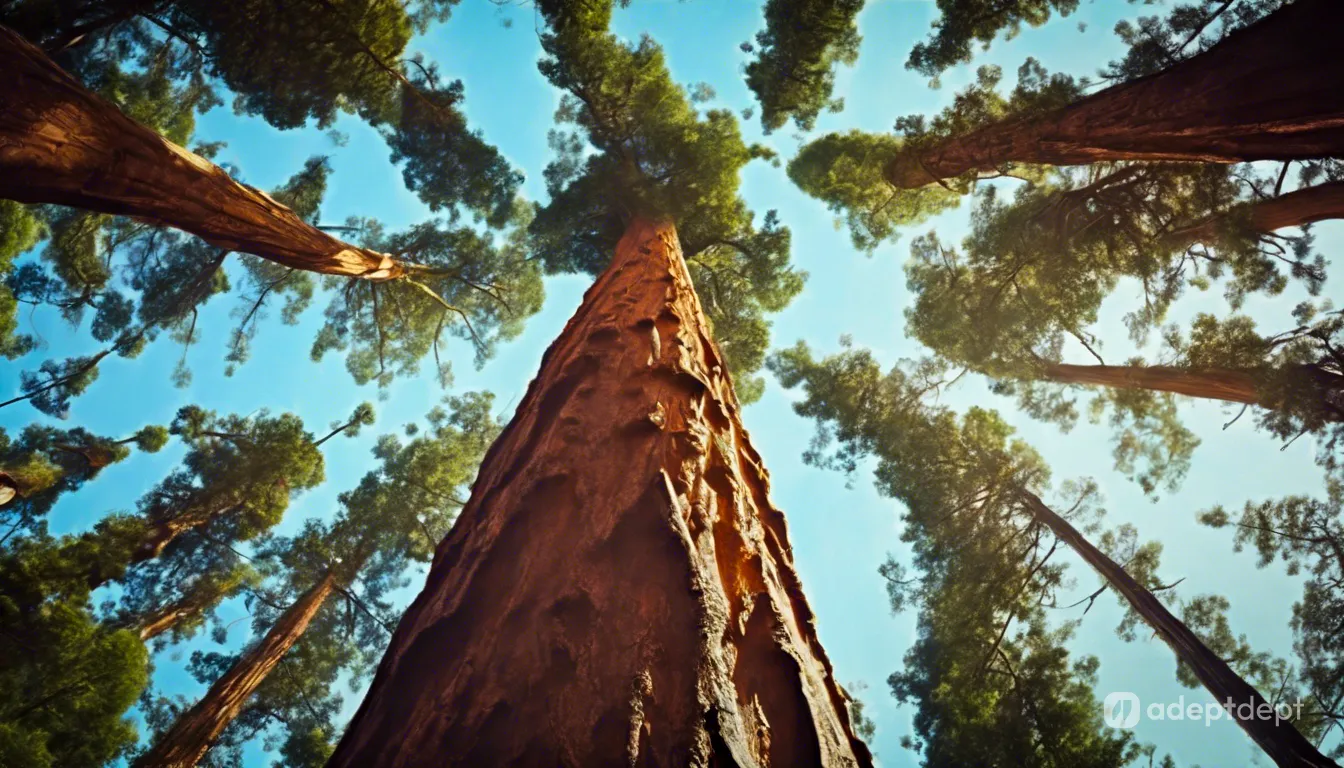
Prompt: Extreme Low-angle View of a majestic, massive Sequoia tree, saturated colors, against the backdrop of a pale blue sky
Focal length
Focal length, measured in millimeters (mm), determines the width or narrowness of the angle of view and affects the depth of field — the area in focus versus blurred.
A smaller focal length number widens the view, reduces magnification, and can distort objects, giving them a rounder appearance.
Conversely, a larger focal length number narrows the view, increases magnification, and flattens objects within the frame.
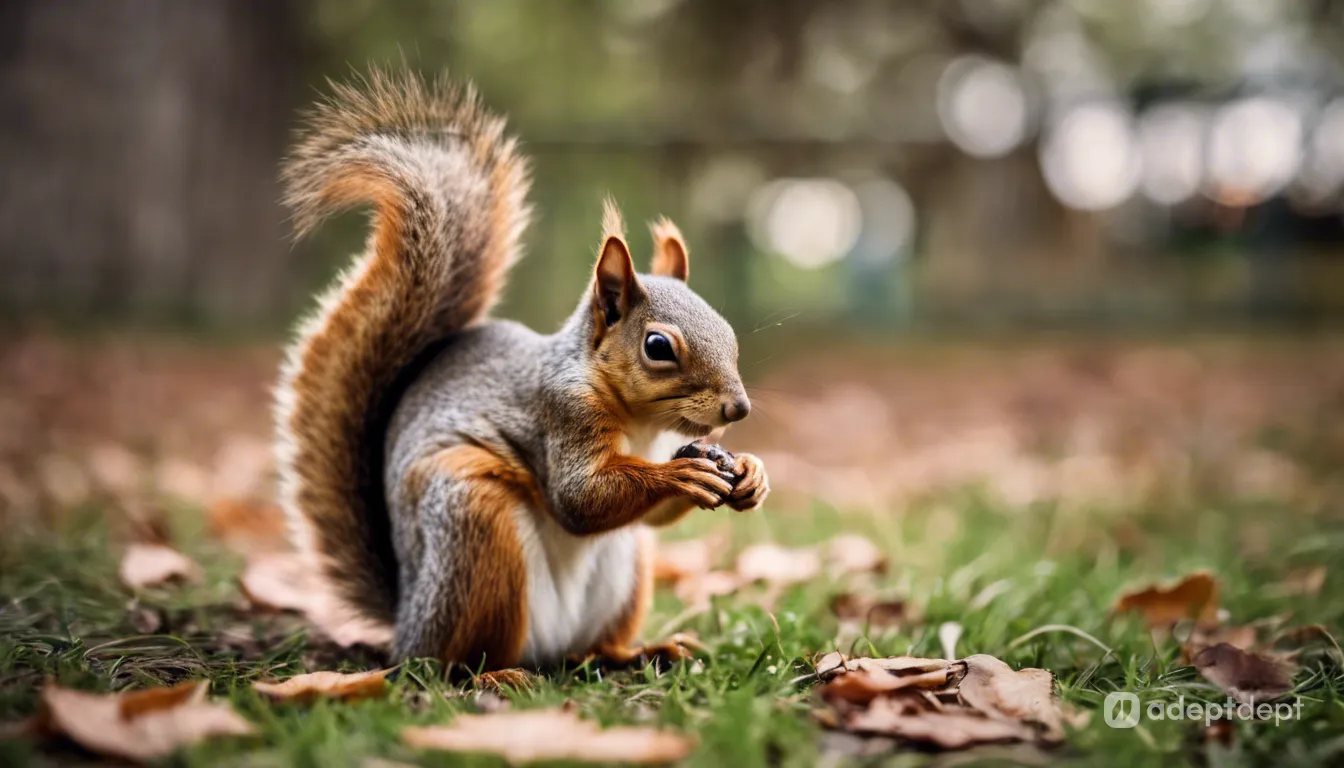
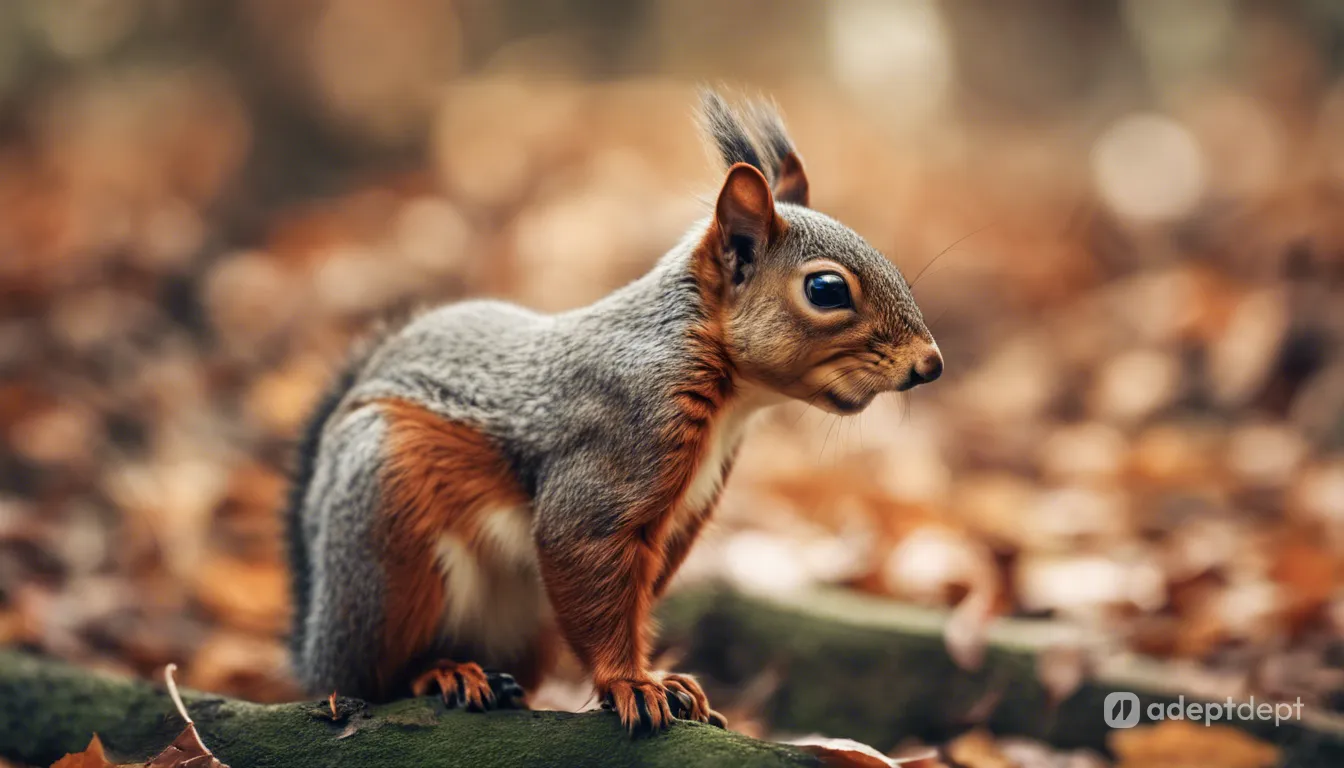
18mm Focal Length
An 18mm focal length goes super wide, letting you capture a lot in a single frame. This makes it perfect for big landscapes and tight spaces. The 18mm focal length can include more background in close-up shots, adding depth and showing the surroundings. Plus, the slight warping it creates can sometimes be a cool artistic effect!
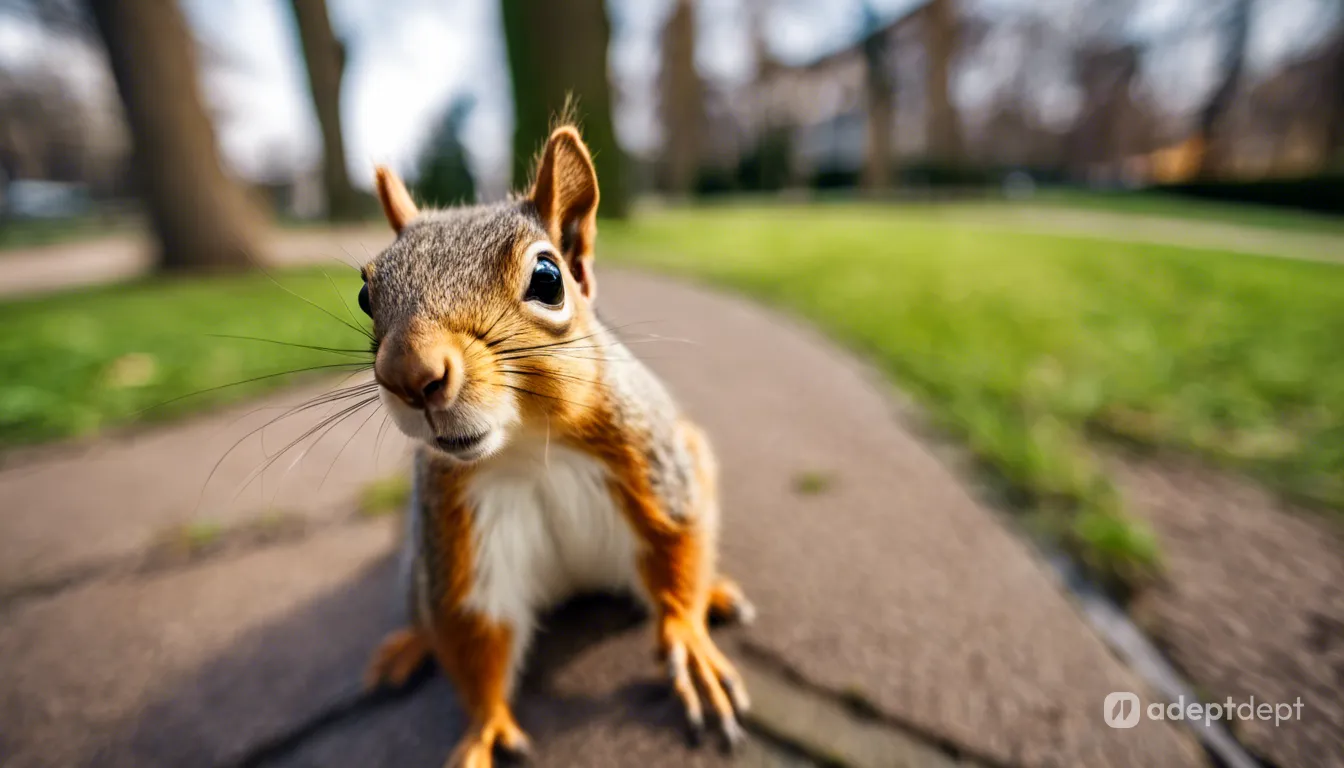
Prompt: Close-up of cute squirrel in a park, 18mm ultra-wide-angle lens, lens distortion.
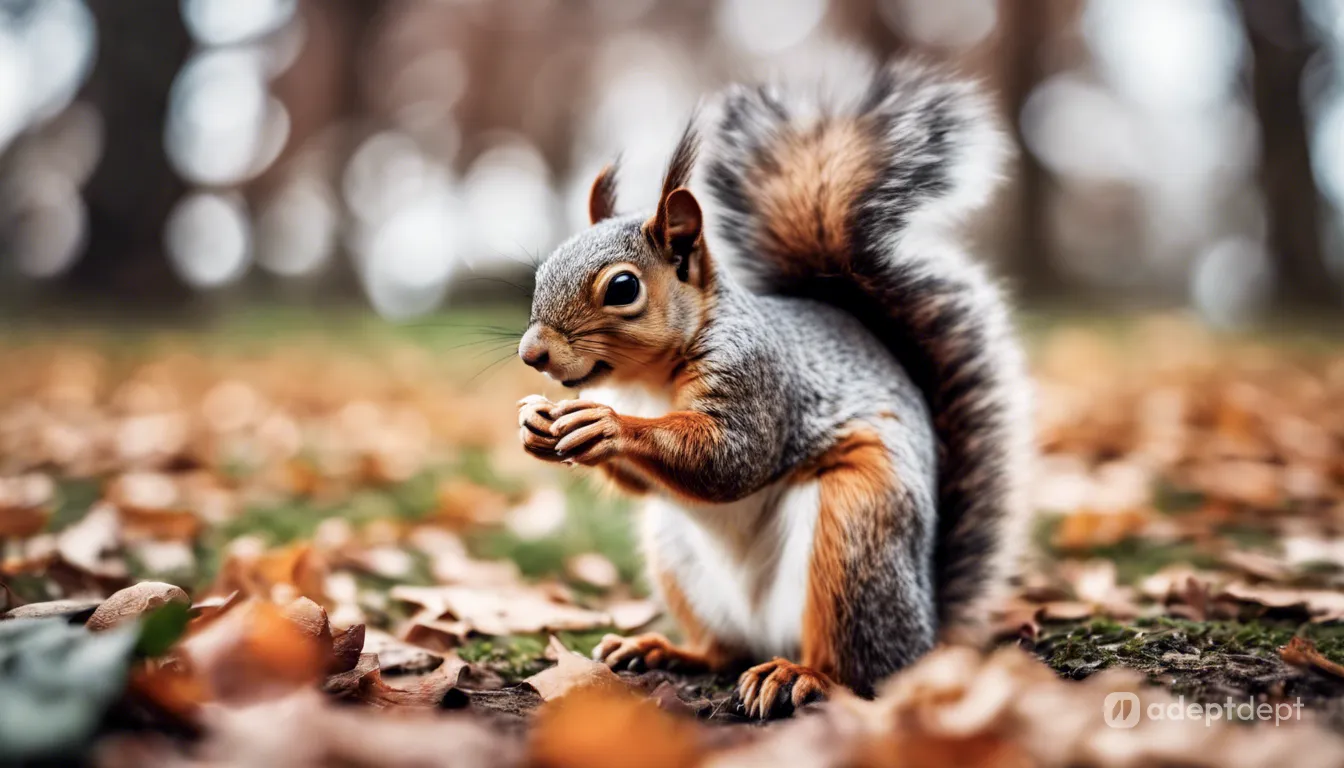
24mm Focal Length
Stepping in a bit from the super wide 18mm, the 24mm focal length offers a versatile wide-angle view that’s great for portraits, street scenes, and landscapes. It captures more background than a standard lens in your portraits and street photography, while still showing a good amount of scenery. The distortion is less noticeable compared to the 18mm, making it easier to frame your subject without warping the image as much.
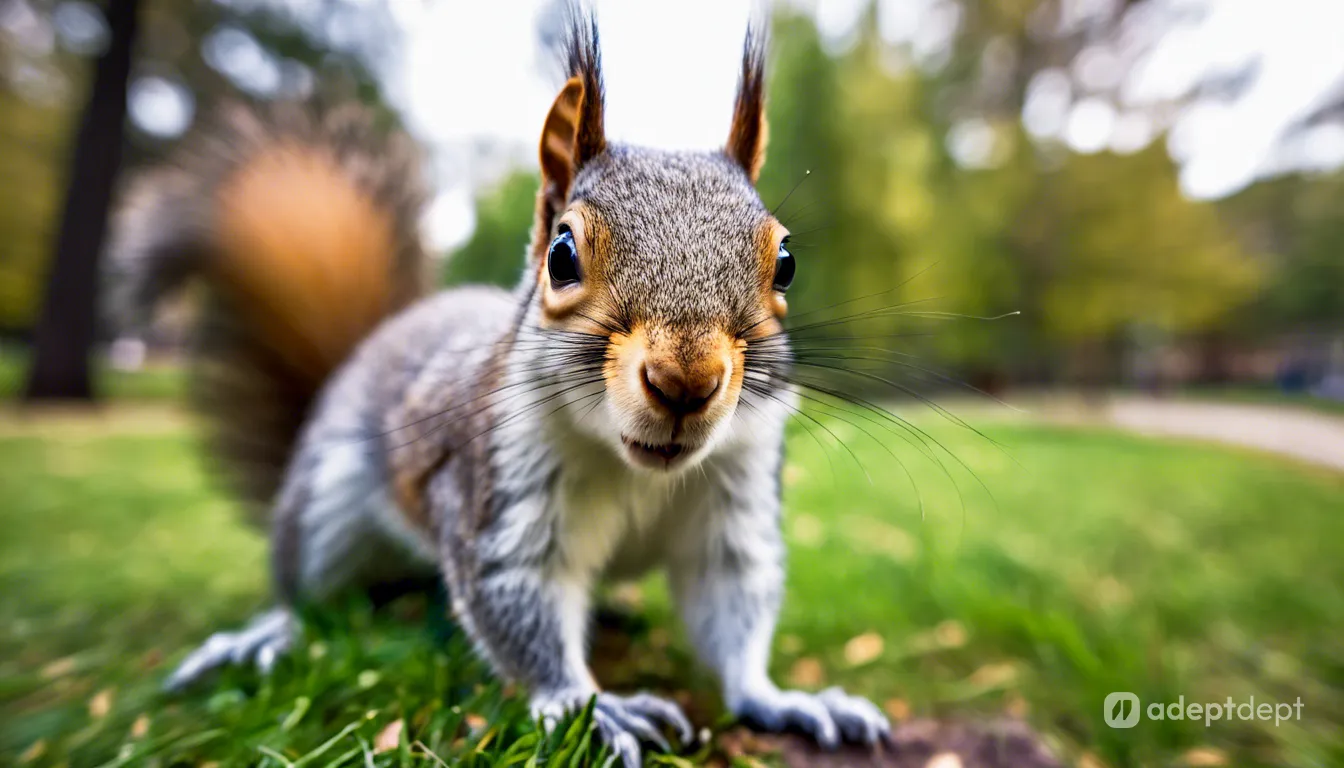
Prompt: Close-up of cute squirrel in a park, 24mm wide-angle lens, lens distortion.
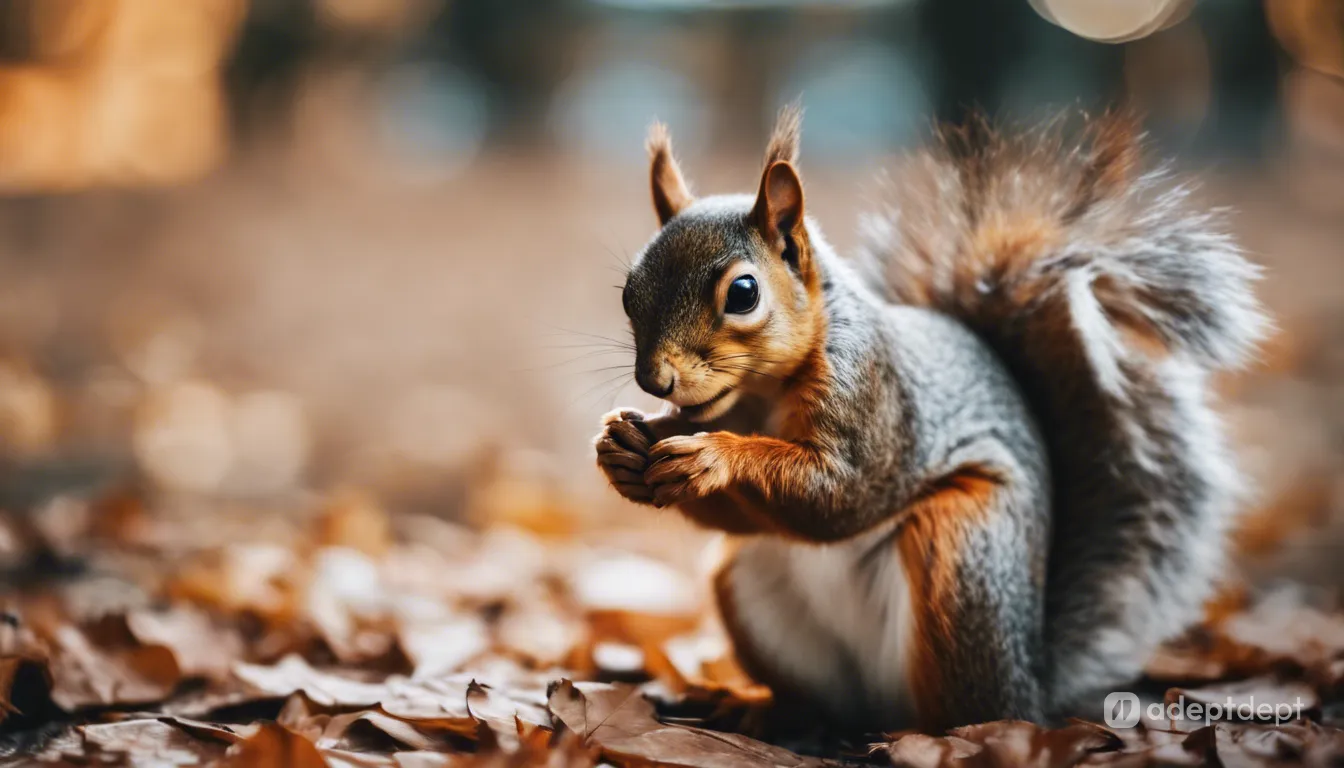
35mm Focal Length
Unlike the wider 18mm and 24mm lenses, the 35mm focal length offers a natural perspective closer to what the human eye sees. This “sweet spot” makes it ideal for capturing the bustle and energy of street photography. It also works well for environmental portraits, where you want to show your subject interacting with their surroundings. Plus, minimal distortion ensures your shots stay true to life.
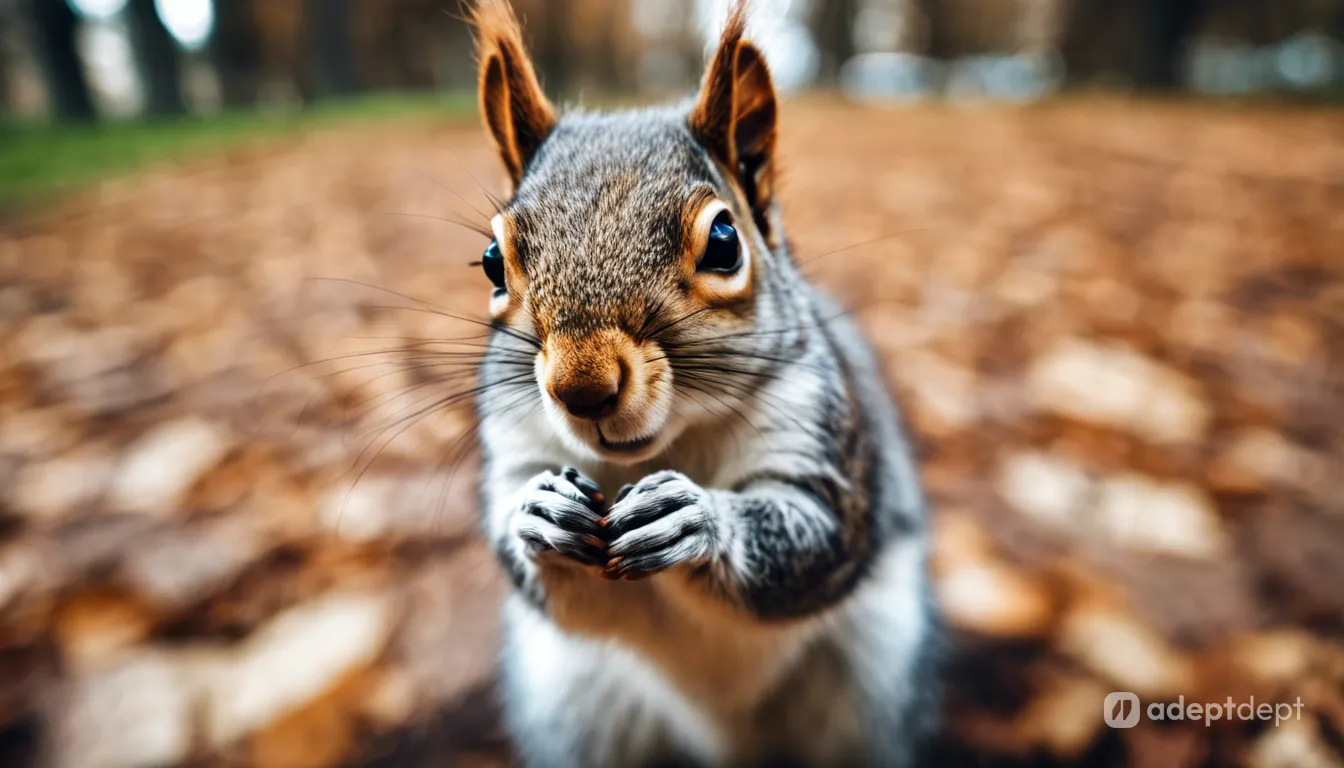
Prompt: Close-up of cute squirrel in a park, 35mm wide-angle lens, lens distortion.
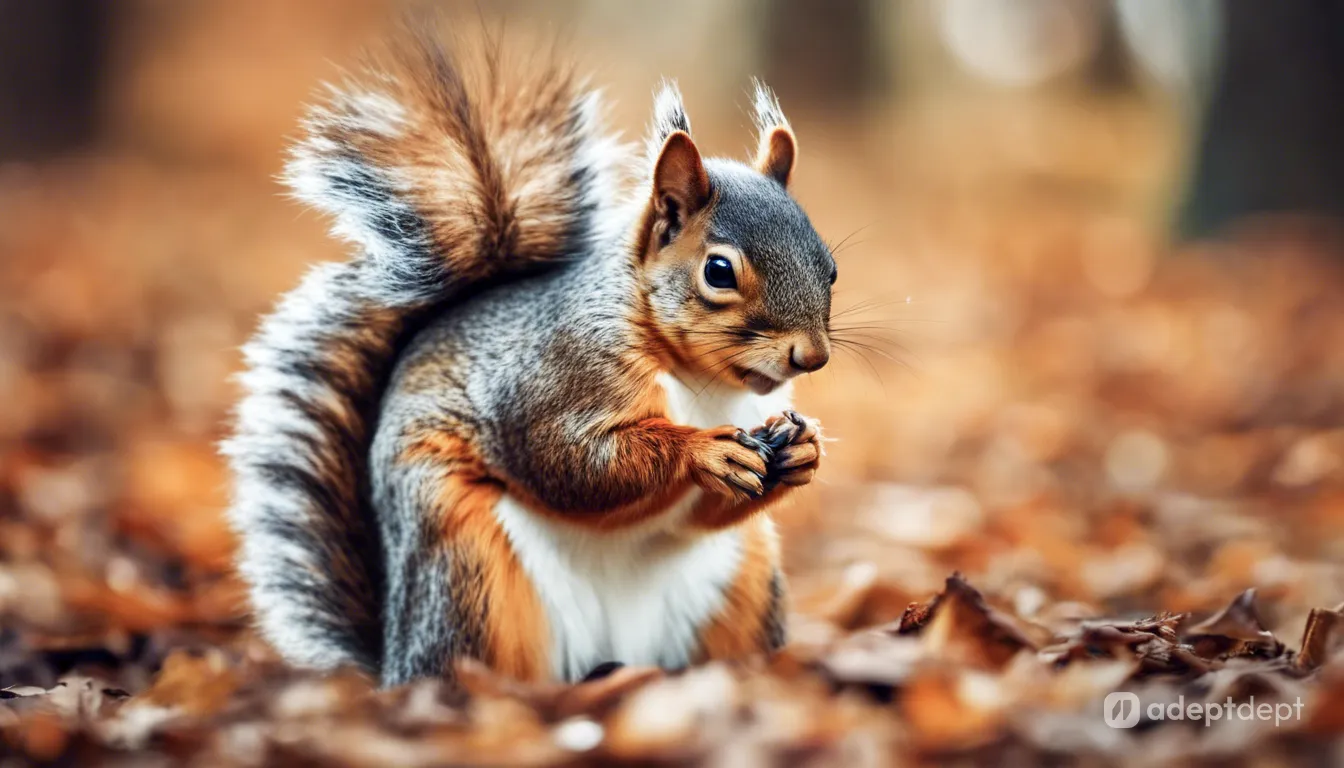
50mm Focal Length
Even closer to natural vision than the 35mm, the 50mm focal length is often is often referred to as the “standard” or “nifty fifty” for its versatility. This lens captures a scene much like the human eye sees it, creating a natural and familiar feel in your photos. It’s a favorite for portraits because it minimizes distortion, ensuring your subject’s features are portrayed accurately. While not as wide as some lenses, this focus on the person creates a more intimate portrait.
Medium Close-up of a cute squirrel in a park, 50mm lens.
85mm Focal Length
The 85mm focal length zooms in a bit, offering a narrower view but a flattering perspective for portraits. It minimizes distortion, which is why it’s a popular choice for capturing people and food close-ups without warping the subject.
Prompt: Medium Close-up of a cute squirrel in a park, 85mm lens.
105mm Focal Length
The 105mm focal length continues the telephoto trend, offering even more magnification. It is great for portrait photography, providing a comfortable distance while creating a flattering look. It is a popular focal length for macro photography where you want a shallow depth of field (blurry background) to isolate the subject.
Prompt: Medium Close-up of a cute squirrel in a park, 105mm lens.
135mm Focal Length
The 135mm focal length further narrows the angle of view and provides magnification. It is the longest practical focal length for portrait photography. Some portrait photographers prefer this focal length, especially for capturing headshots with a smooth and ‘creamy’ background. However, personal preferences play a role, and its magnification requires the viewpoint to be quite far to properly frame the subject.
Prompt: Medium Close-up of a cute squirrel in a park, 135mm lens.
200mm Focal Length
Focal lengths of 200mm or higher are telephoto lenses, perfect for isolating subjects from a distance. They are ideal for wildlife, sports, and astrophotography. As the focal length increases beyond 200mm, images may look similar, and you need to be farther from the subject to keep the framing consistent.
Prompt: Medium Close-up of a cute squirrel in a park, 200mm lens.
Special Lenses
Sometimes, you want your AI art to stand out with unique effects. These days, fancy software can add effects later, but photographers used special lenses to achieve these looks in the past. Let’s explore these lenses and see how they can spice up your AI image prompts!
Fisheye Lens
Fisheye lenses are like super wide-angle cameras on steroids! They capture almost everything in sight up to 180 degrees, bending the scene into a cool, curved bubble effect. This lets you capture extremely wide landscapes or stuff everything into a tight space, all with a trippy, distorted look.
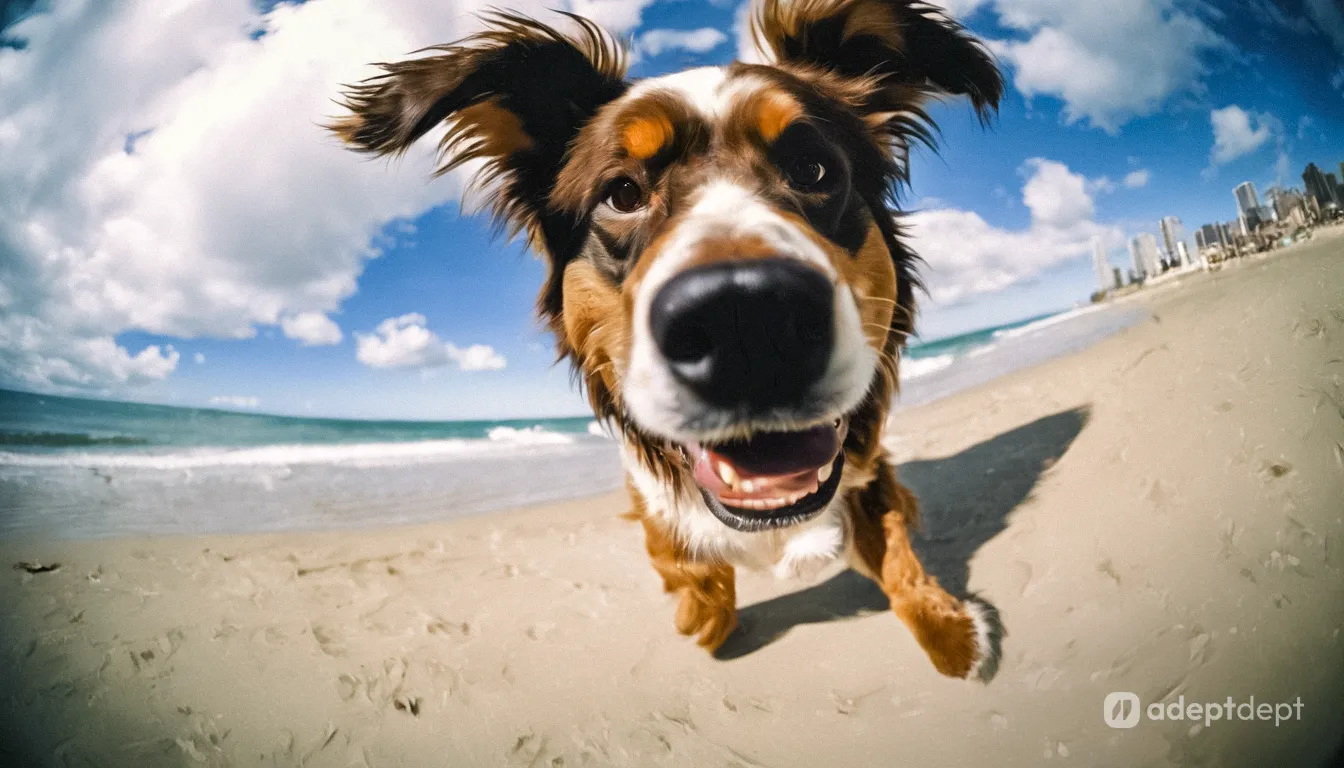
Prompt: Fisheye lens, medium close-up photo of a cute dog playing on the beach.
Tilt-Shift Lens
Have you ever seen a photo where a city looks like a miniature model set? That’s the magic of a tilt-shift lens! This special lens lets photographers blur parts of the image, creating a cool “miniature effect” that makes giant buildings look tiny. By including “tilt-shift lens” in your AI prompt, you can add a cool, miniaturized look to your AI image.
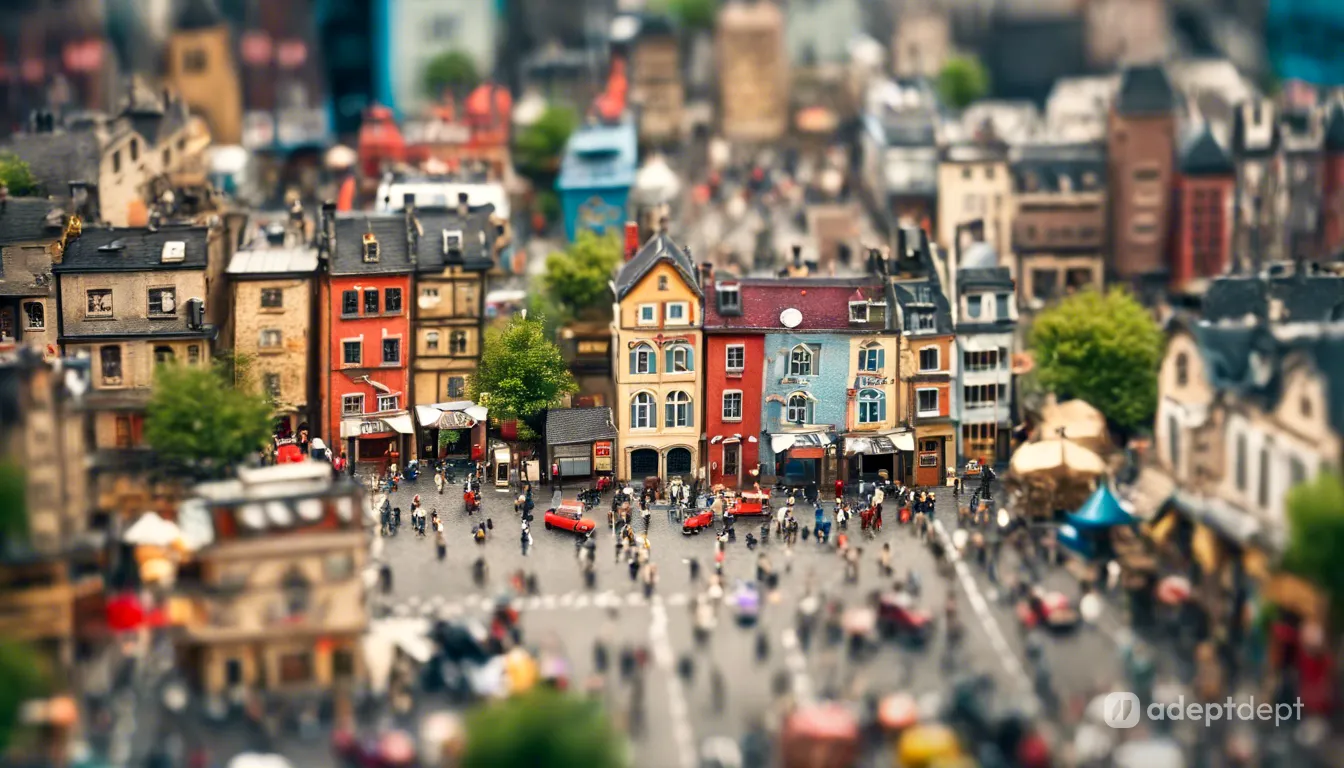
Prompt: Tilt-shift lens of a bustling cityscape, emphasizing miniature-like buildings and streets.
Lensbaby
Lensbaby lenses are all about creative blur! Unlike regular lenses that keep everything sharp, Lensbaby lets you blur most of the image and focus on a specific spot. This creates a dreamy, almost magical effect, perfect for unique portraits or highlighting special details in your scene.
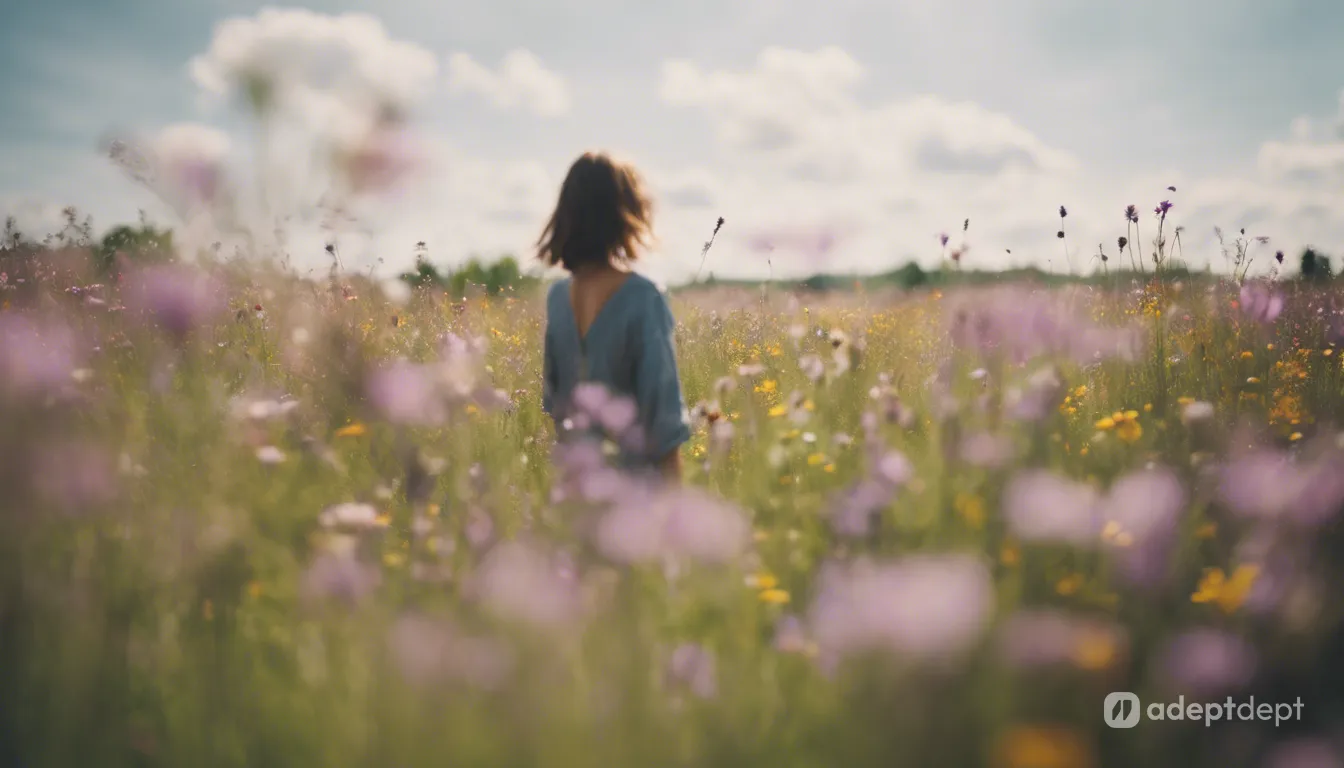
Prompt: Lensbaby:1.5 portrait of a person in a field of wildflowers.
Infrared Lens
Infrared lenses are like special sunglasses for your camera that can see things invisible to the naked eye! This lets them capture a world beyond what we normally see, creating almost alien-looking landscapes. Because infrared light reacts differently to plants and other objects, these lenses can make vegetation glow pink or red. It’s perfect for creating those mysterious and otherworldly vibes.
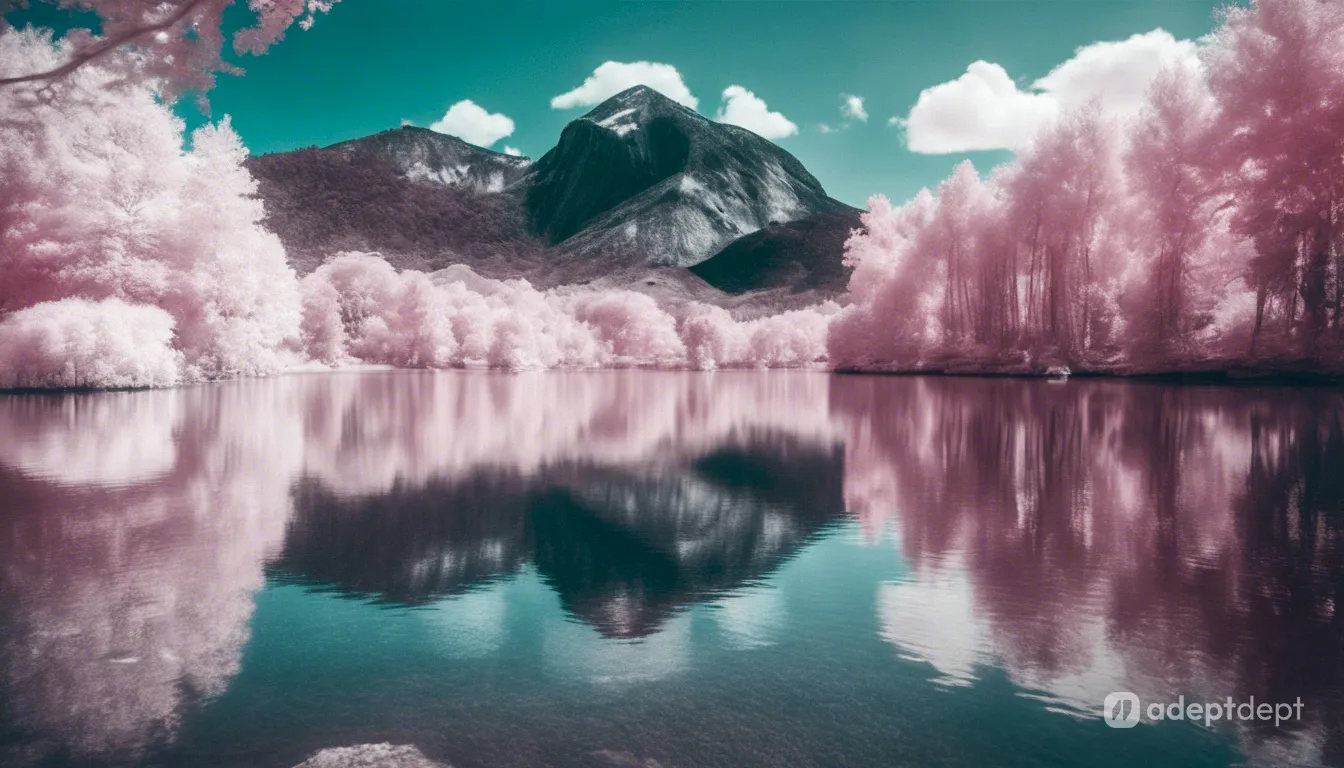
Prompt: Infrared Lens photo of a beautiful lake and mountain.
Pinhole Lens
Pinhole lenses ditch the glass and use a simple pinprick to capture light. The result? Soft, dreamy photos with and a dreamlike quality. Include ‘Pinhole lens’ in your AI prompts for a more more experimental and back-to-basics approach to your images.
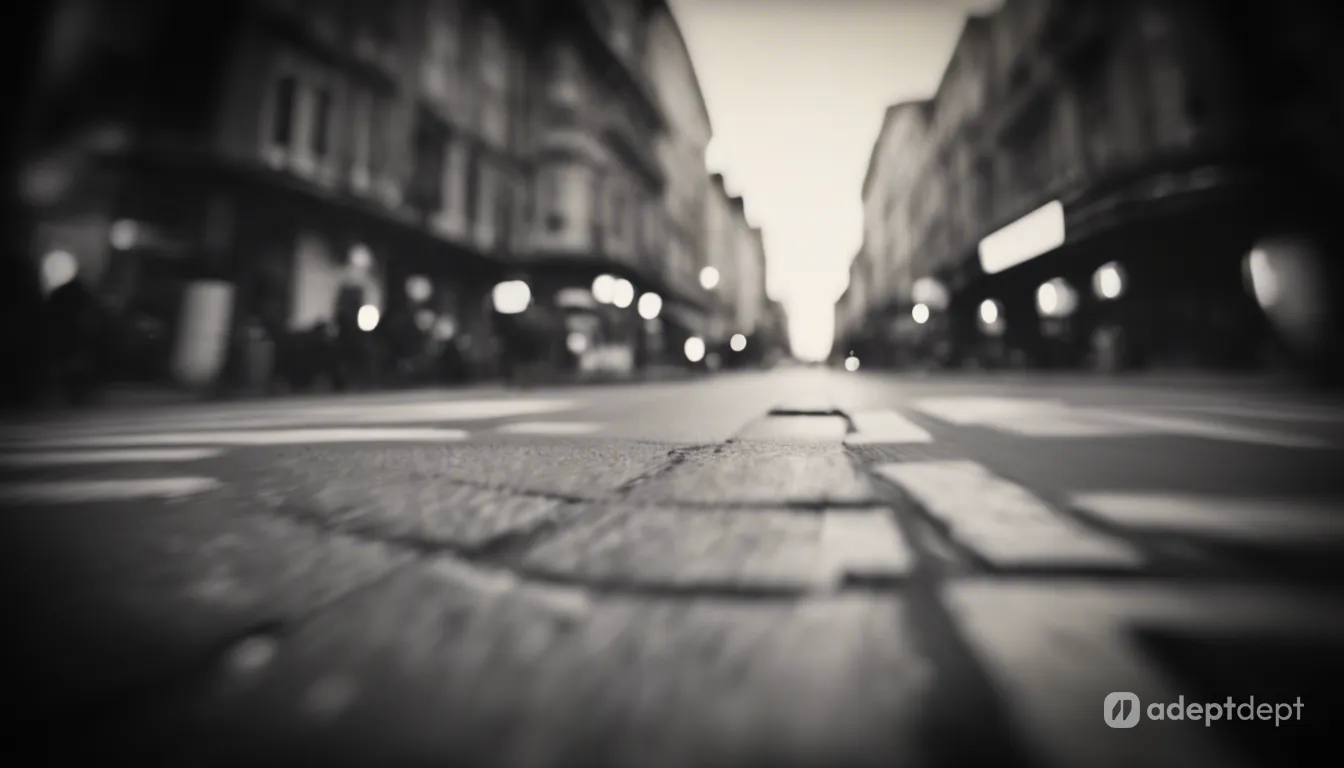
Prompt: Pinhole camera photo of a street view, heavily distorted.
Shutter Speed
Shutter speed, like a blink, controls how long light hits a camera sensor. Play with shutter speed in your AI prompts to control how movement appears in your images!
Short Shutter Speed (Fast Shutter Speed)
Want to capture action without a blur? Use “short shutter speed” in your AI prompt! Think of it like a quick camera blink. Less light gets in, so the image might be darker, but that’s the trade-off for freezing the moment perfectly. This is great for catching splashes, jumps, or race car finishes!
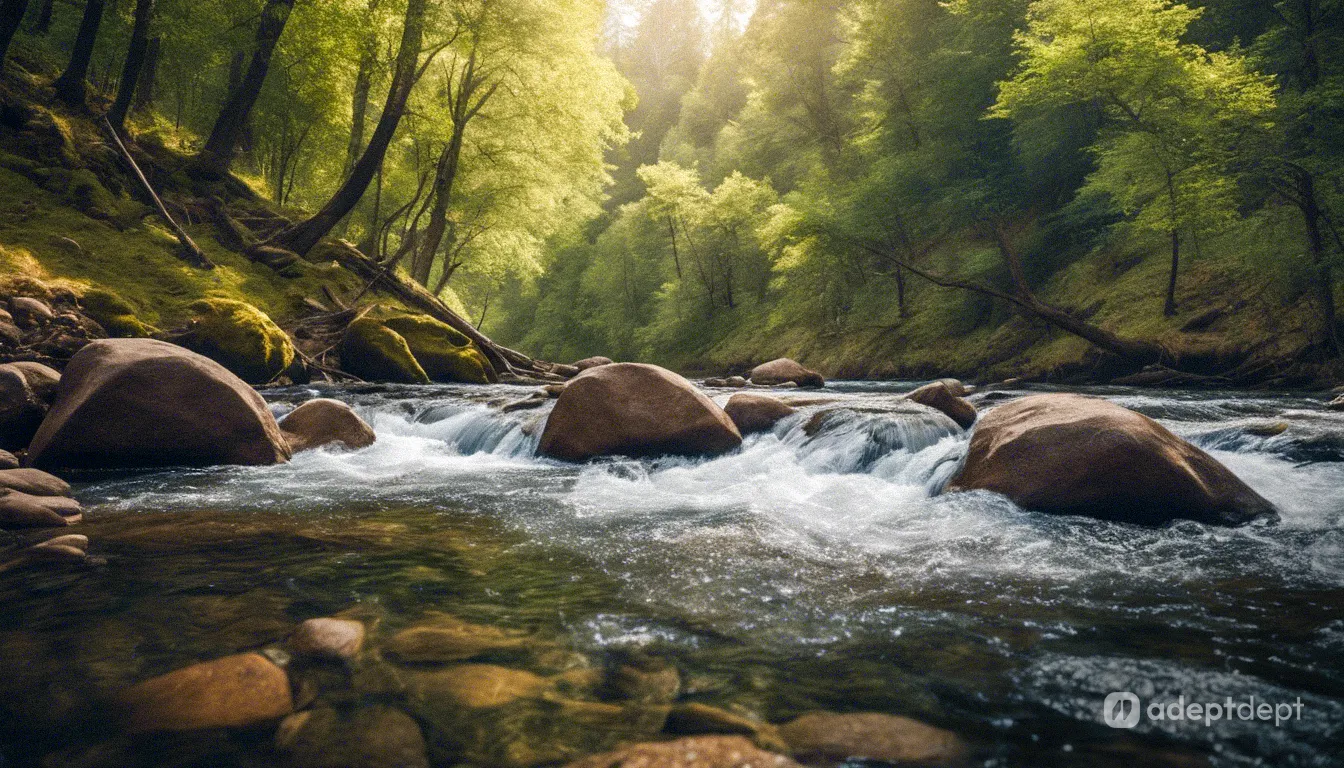
Prompt: Sharp photo of a flowing river in a forest during the day, 1/1000s ultra-short shutter speed, crystal-clear water.
Slow Shutter Speed (Long Shutter)
Ever seen those photos with blurry waterfalls or streaky city lights? That’s slow shutter speed in action! The camera’s shutter stays open longer, like a slow blink, capturing movement and light over time. This creates a cool blur effect, perfect for showing motion or starry night skies. But be careful, too long and your image might get too bright! Try including ‘slow shutter speed’ in your prompt to achieve that dreamy, blurred motion look.
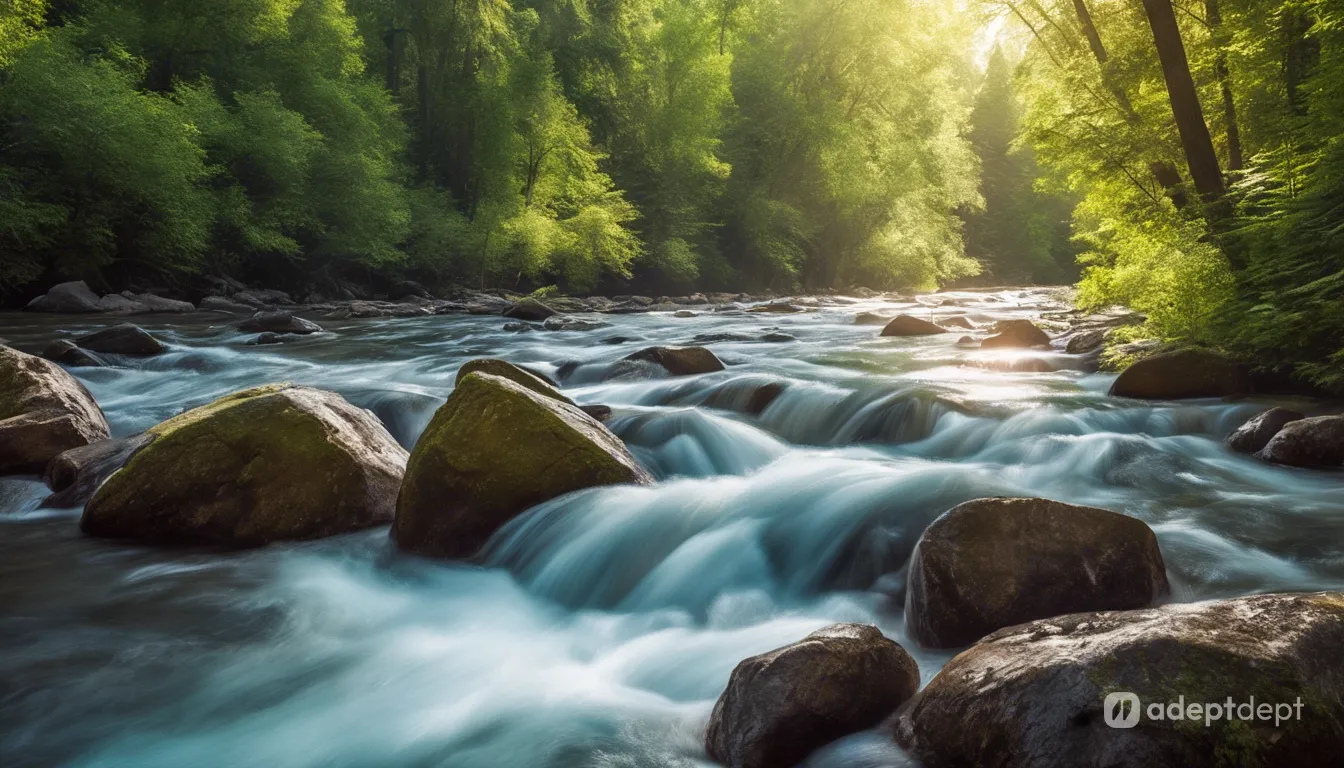
Prompt: Photo of a flowing river in a forest during the day, 1/2s long shutter speed, crystal-clear water.
Aperture
Think of aperture as the size of your camera’s eye, opening and closing to control how much light gets in (making the image brighter or dimmer). Not only does aperture control light, it also controls how blurry or sharp elements are in your image. By playing with aperture in your AI prompts, you can tell the AI how blurry or sharp you want your image to be.
Wide Aperture (Blur the Background)
A wide aperture is like opening your camera’s eye really wide (low f-number between f/1.4 and f/5.6). This lets in lots of light and creates a cool blur effect in the background, perfect for portraits or making your product pop! Think of it like putting a spotlight on your subject — everything else fades away.
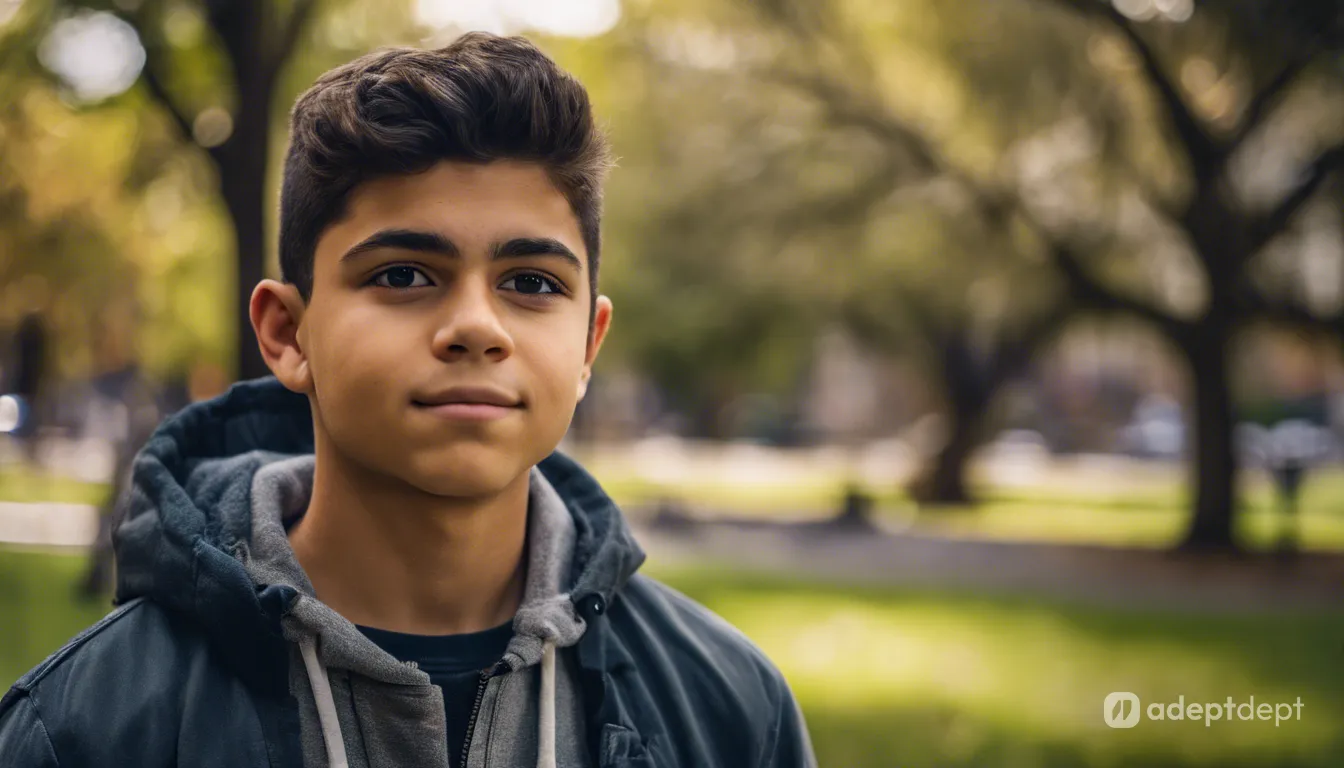
Prompt: Photo of Diego, a Hispanic teenager, at a vibrant park with towering trees, expansive fields, and a picturesque landscape, f1.8 aperture.
Narrow Aperture (Sharp Focus Everywhere)
A narrow aperture is like squinting your camera’s eye a bit (high f-number, like f/11 or f/32). This lets in less light but keeps everything in focus, from front to back. It’s perfect for landscapes, buildings, or scenes with lots of details you want to see clearly.
While some AI art models might struggle with narrow apertures in portraits (they love that blurry background!), you can still experiment!
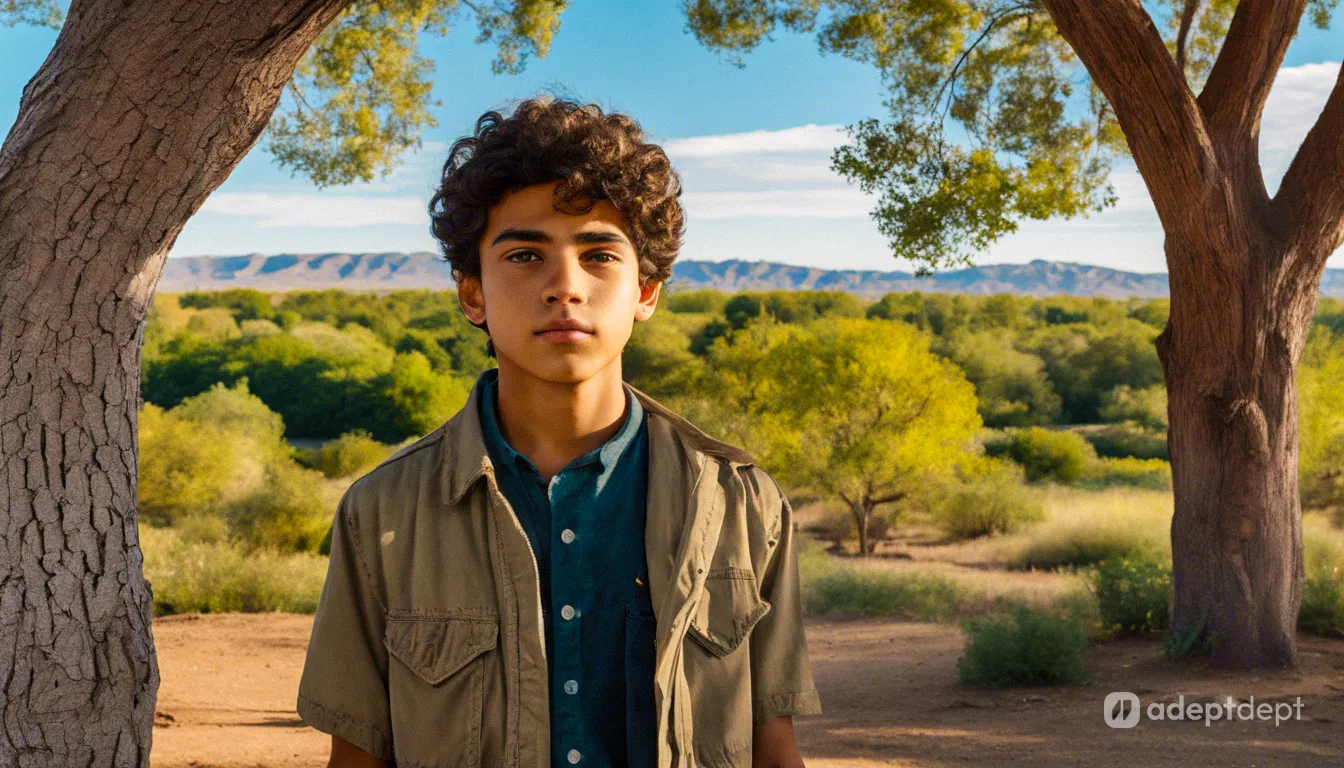
Prompt: Photo of a vibrant park with towering trees, expansive fields, and a picturesque landscape, and close-up portrait of Diego, a Hispanic teenager, f32 aperture. Negative Prompt: Bokeh, shallow depth of field, blur, blurry background.
ISO
ISO controls how sensitive your camera is to light. Think of it like your camera’s night vision! Higher ISO lets you capture images in darker environments, but it can also add a grainy effect called “noise.”
For AI art, ISO isn’t a huge deal. Most AI art models can fix lighting without the noise. You might only need to worry about ISO if you’re going for a super realistic look.
Low ISO
Perfect for bright scenes! Think of taking a picture in well-lit environments. Low ISO values (e.g., ISO 100 or 200) keep your photo crisp and clear, with no graininess.
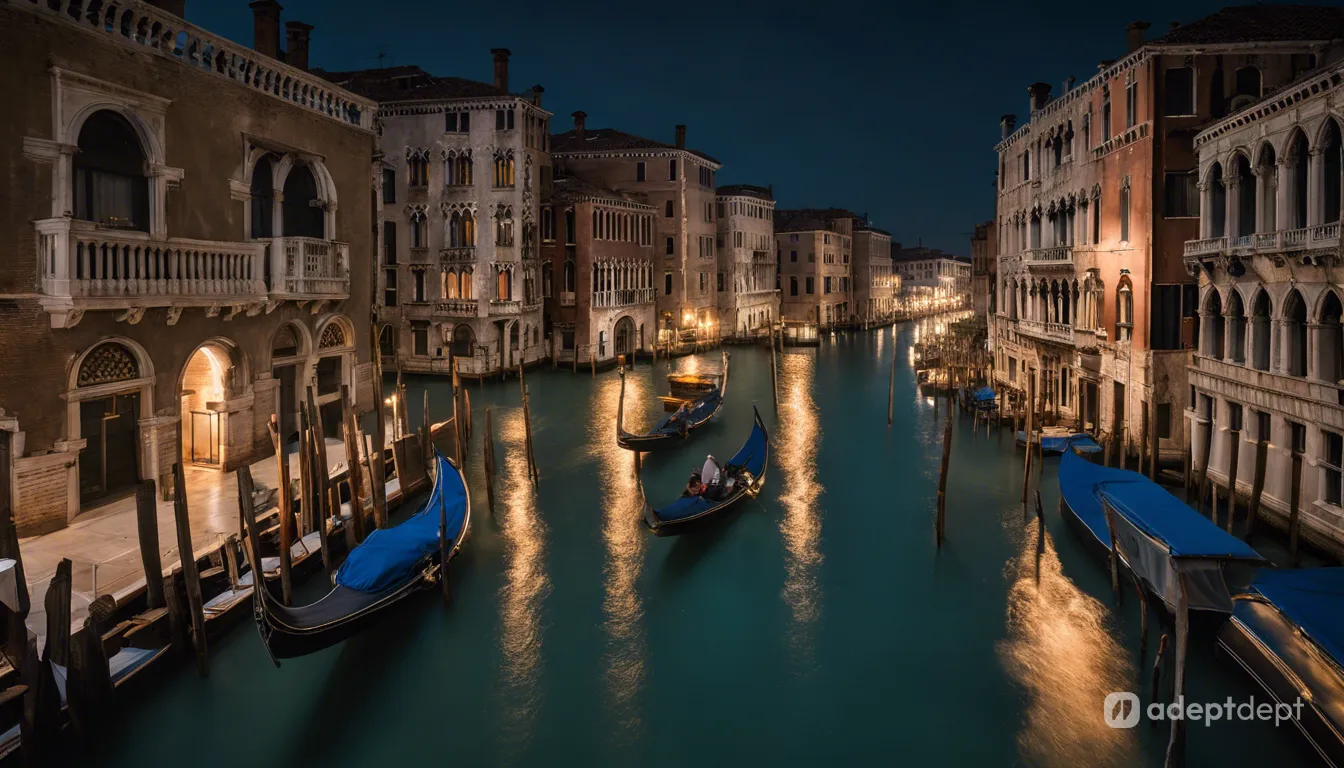
Prompt: Photo of the Venice Grand Canal, at night, ISO 100, 1/20s shutter speed, f11 aperture, very dark.
High ISO
Ever try taking a picture at night? Higher ISO values (e.g., ISO 800, 1600, or beyond) help capture images in darker environments, but it can sometimes add a speckled effect called “noise.
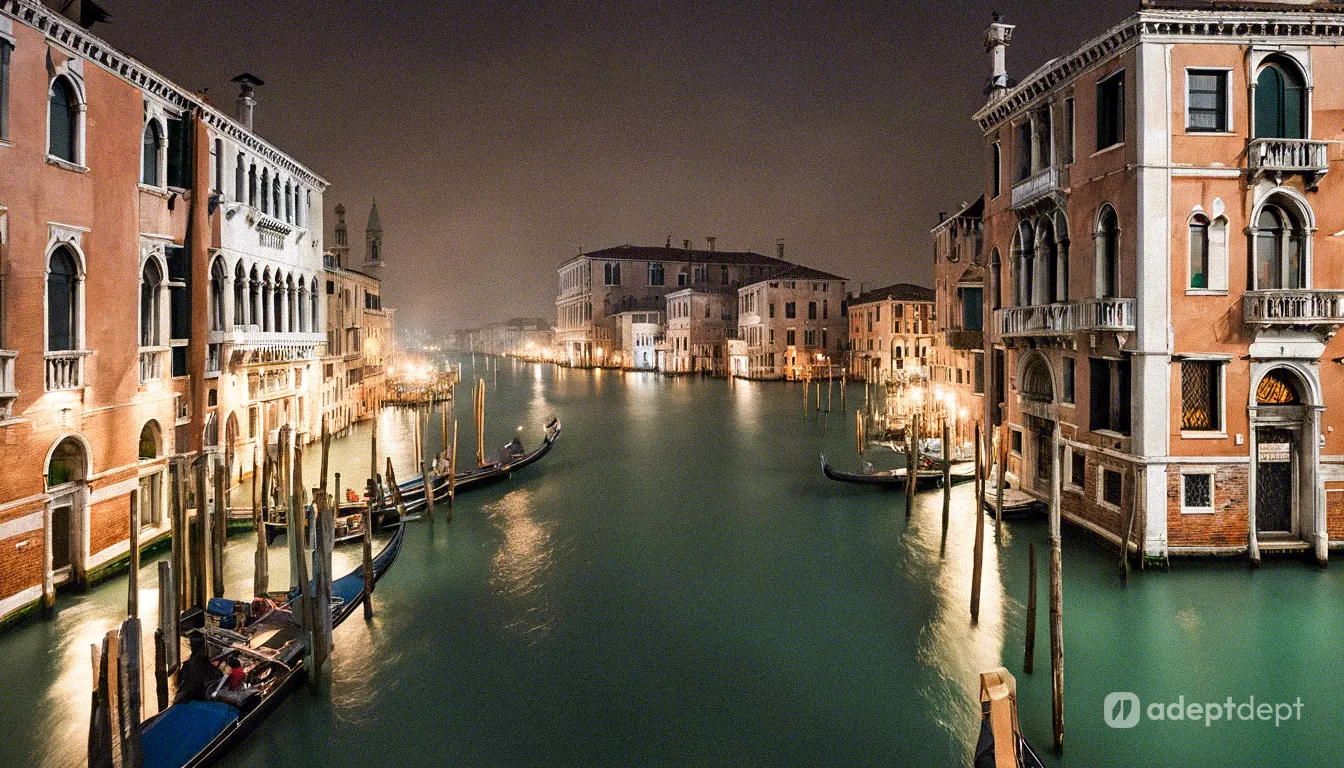
Prompt: Photo of the Venice Grand Canal, at night, ISO 6400, 1/20s shutter speed, f11 aperture, noise.
Mastering AI Image Prompts: Your Recipe for Success
Hopefully, this comprehensive guide to AI image prompting has provided you with the knowledge and the vocabulary to kickstart your journey into AI image generation.
Here’s a simple recipe to get you started:
- Artistic Style: A painting, a sketch, a photorealistic image, or something more abstract?
- Your Vision: What do you want in the picture? Think subjects, colors, mood, materials, and how you want things positioned.
- Lighting & Time: Daytime scene bathed in sunlight, or a mysterious moonlit night?
- Framing: Close-up shot, wide landscape, or something in between?
- Technical Touches (Optional): Play with details like blur (shutter speed) or background focus (aperture). Let the AI be your sous chef and handle the rest!
Prompts can be short and sweet, or super detailed — it’s up to you! Start with a basic idea, see what the AI generates, and then refine your prompt based on the results. Don’t be afraid to experiment — that’s half the fun! With a little practice, AI prompting will become a breeze and a powerful tool in your creative repertoire.
Happy prompting!
Ready to put your creativity to the test? Try Adept Dept’s AI Image Generator and see what amazing images you can create!